Tuesday, January 28, 2020

Delicate Beauty Floral Card


Hi again

It's my turn on the blog for Bizzy Becs 
and today and I would like to share a card with you.

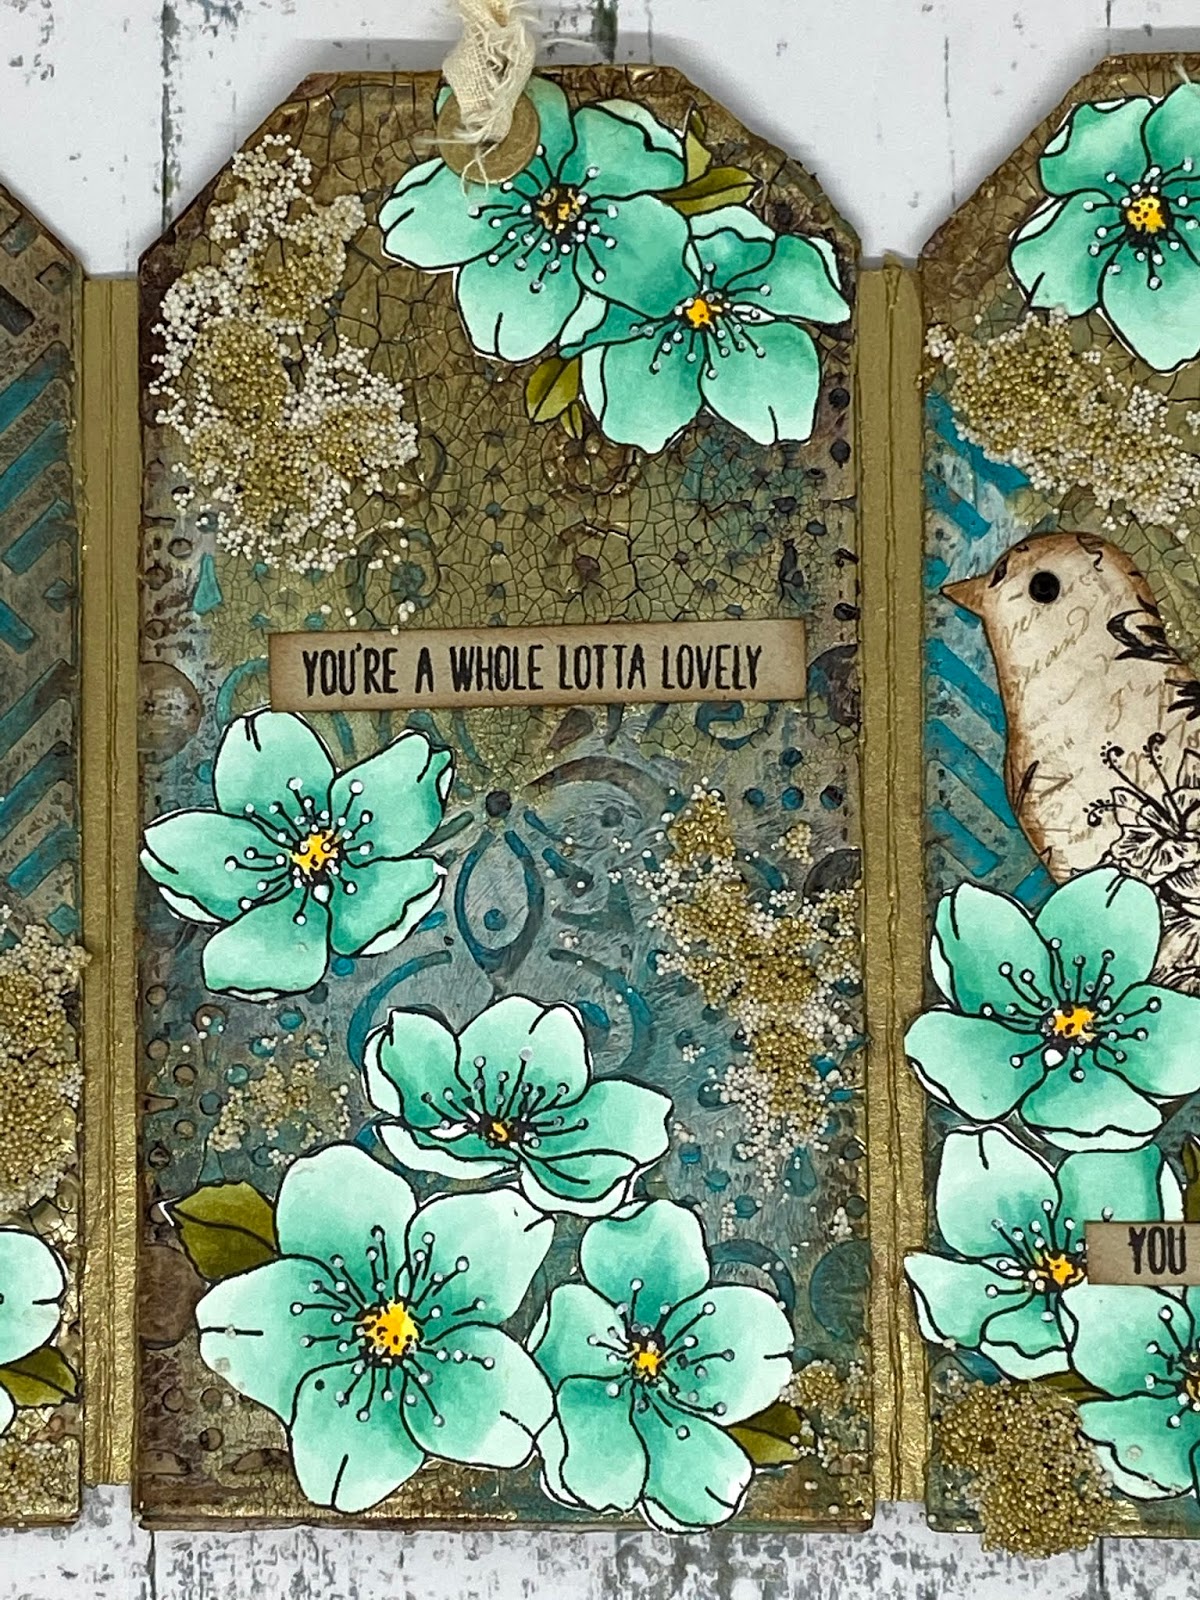
I wanted to create a card that looked like floral wallpaper and I used the gorgeous Penny Black Delicate Beauty floral stamp to create that effect.


My card was made by stamping the flowers onto blending card using Mimento Tuxedo black ink and copic coloured. I kept the colours crisp and bright.

The background of my card is also coloured with copic markers on light BG series colours.


I have heat embossed my sentiment in white embossing powder but the main sentiment is Die Cut out.


Supplies Used:

Sue Wilson Dies- You are simply the best ( by request)
Taylored Expressions - Simple Strips Background
Taylored Expressions- Simple Strips Die


I hope you all had a wonderful Australia Day long weekend and got some crafting time in.

Don't forget to stop into the shop and have a look there are so many wonderful products that you can pre-order

Until next time

Mandy x

Saturday, January 25, 2020

Triptych Tag Card


Hi there
Today I have a mixed media project to share with you.

I have used the gorgeous new Stitched Tag Die set to create a three panel card.

To create some texture to the tags I have cut panels from the new decorative background dies and cut the with the tag die too. This layer is then glued onto the base using matt gel.

Once dry I have added a layer of gesso and gold crackle medium. 


Once all the layers have dried I have painted the tags with acrylic paint I have also added really small art stones for more texture. 


I have glued all 3 Tags onto a piece of craft card leaving a gap between each one. I have also backed each of them with another tag die cut to hide this panel. once dry I have pained in the visible pieces with gold acrylic paint and scored each piece so that the tags concertina to create the triptych panel.


The Blossoms from the Lovely florals Blossom stamp set are stamped onto Neenah card with Mimento tuxedo black ink and coloured with copic markers
I have fussy cut them out with scissors and layered them onto the panels with Matt medium.


Details showing all the textures and layers.


The birds are cut out of craft card and then a second time with scraps of scrapbooking paper.
I have glued the two layers together and inked around the edges.


The sentiments are from the Blossom stamp set and just cut out into strips. 


Supplies used:

18412 Stitched Tags Die set
18463 Charlotte decorative Background Die
18466 Madeline Decorative Background Die
17748 Lots of Birds Metal Die
18183 Lovely Florals Blossom Flowers Stamp set


Thanks for stopping by to have a peek. I hope you have a lovely Long weekend ( here in Australia)

Until next time

Mandy x


Tuesday, January 14, 2020

Blossom greeting card in soft pink for Paper Rose


Hi Again, 

I am super excited to be on the Paper Rose Design team for another year.
 I am really looking forward to 2020 an I have so many ides and projects to share with you throughout the year.


For my card today I have used the gorgeous Blossom Outline die.

let's start with the background, I have used Nuvo Expanding Mousse in Grey Matter. 
You can heat this mousse up to distress and puff it up but I haven't really worried about doing that as I really just wanted the pewter, slightly metallic finish it has.


I have simply applied the mousse through a stencil, Moroccan Lattice  6 x 6 stencil, with a spatula and set aside to dry.


The flowers are cut out and glued onto card, I have then used Copic Markers to colour them.
After colouring I have then glued a second flower thin line die cut onto the first one giving it a white edge.

I have then fussy cut the flowers right to the edge of the raised line using scissors so that there is no white edge left behind.


I have then added a little sparkle with a Nuvo clear sparkle pen to give the flowers some impact.


I have then added a few grey sequins to the flower centres and my stamped and die cut sentiment.


Supplies Used: 
18168 Blossom Outline 
18138 moroccan Lattice 6 x  stencil
18255 Friend Layered Word die
17496 Poppies Stamp Set ( sentiment only)


Thanks for stopping by,

Until next time
Mandy x


Sunday, January 5, 2020

Thanks for all the Laughs card


Hi there

I hope you are having a wonderful weekend 

Sending out thoughts and prayers to all those affected by the fires raging throughout the country.
Please stay safe all of you.

Today I would like to share a card with you for Bizzy Bec's and our monthly challenge.


To create my background I have copic coloured the cutaway pieces by sticking them down onto 
press n seal allowing me to keep them in place so I could colour them from light to dark.


Once coloured in I have pieced them back into the background.


Supplies Used:

Picket Fence Studios - Sierra Girl Stamp
Picket Fence Studios - Sierra Girl Die
Picket Fence Studios - Small Ways to say Thank you
Papertrey Ink- Shapeshifters Oval 2 Die( by request)


Don't forget to Pop into the store and have a look at all the great products you can pre-order.

Until next time 

Mandy x

Saturday, January 4, 2020

Sparkle into the New Year


Hello 2020, 

I hope you all had a super Christmas and I hope you all have an amazing new year ahead.

I am super excited to share this year with you and Paper Rose Studio on the 2020 design team.
I totally enjoyed the challenge of last years projects and am thrilled to have an opportunity to continue on into 2020


My first Card  for this year uses a technique that I saw Jennifer Maguire use a while back and I have wanted to try out myself for ages and when the new Amelia Background Die came out I knew that this would be just perfect to try with this technique.


To create this look she has used a paper piecing technique but instead of coloured card ....glitter!

How cool is that!


To create this I die cut the gorgeous Amelia Decorative Background out of Double sided sticky sheet that had been applied to plain white card.

After die cutting carefully remove the die so that all the cuts remain in place.

You then remove pieces of the sticky backing sheet.
 So all the areas I wanted to glitter in teal I have removed leaving the rest protected by the remaining sticky backing.
Apply the glitter pressing it into the glue and brush off the excess.
Next remove the backing for the next colouring repeat the process, I glittered the white "frame" area last.

I love the final result of the background and all I did to flatten out the glitter was to cover the whole completed background with a piece of paper to protect it and burnished it with a bone folder to make sure everything was nice and flat and well stuck down.


Supplies Used: 

18469 Amelia Decorative Background Die
17985 Beautiful Words stamp set
18306 Sparkle layered Word Die

Thanks again for dropping by to have a look at my project, I hope this new year is a good one for all of us.

Until next time

Mandy x