Friday, February 25, 2022

Bold Leaves stamp from Paper Rose Studio


Hello Again


Today I am Sharing with you my third project for February

for Paper Rose Studio.

I have used the new Bold Leaves 3 stamp to create my

latest card.
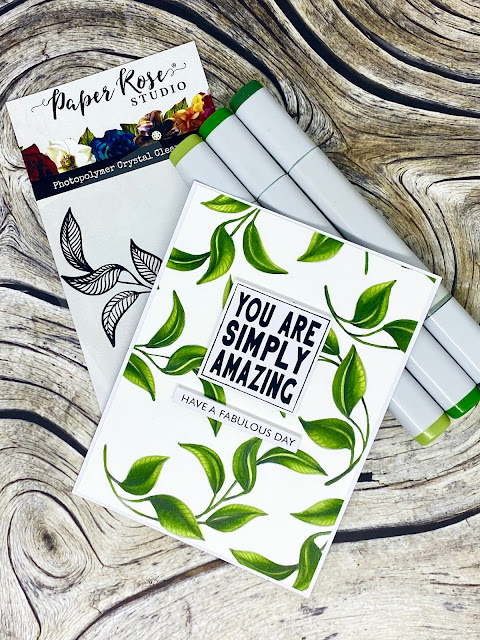


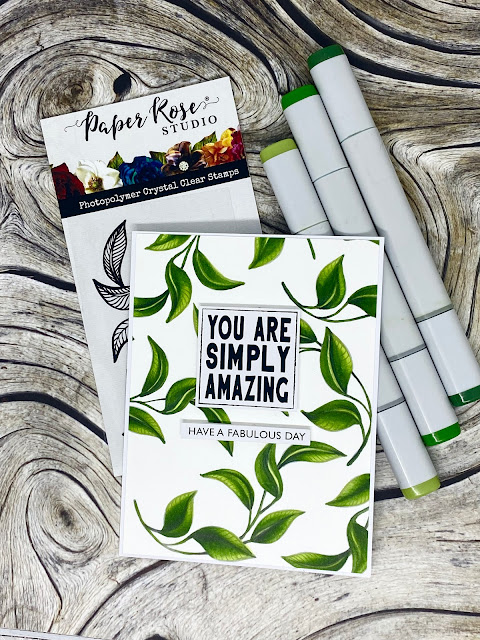
This is all about the leaves! 
I have stamped in a light grey ink onto blending card 
so that when coloured the lines of the stamp a still visible but not dominating the 
coloured leaves.


Keeping everything clean and simple really works for this card
I have added sentiments from the black & White sentiment
pack mounted onto foam tape to complete the card


Supplies used;

24712 Bold Leaves 3 Stamp

19023 Black and White Sentiment pack

Copic Markers:

YG03 , YG17 , YG67


Thank you for stopping by to to have a look 


until next time 

Mandy x

Monday, February 14, 2022

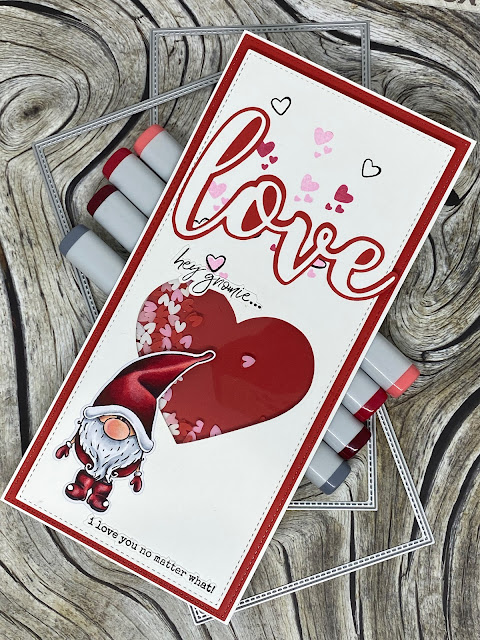
Hey Gnomie, Happy Valentines Day


Hello There!

Happy Valentines day everyone


It's my turn to share a card for Paper Rose Studio and 

as today is Valentines day I made a 

card for hubby!


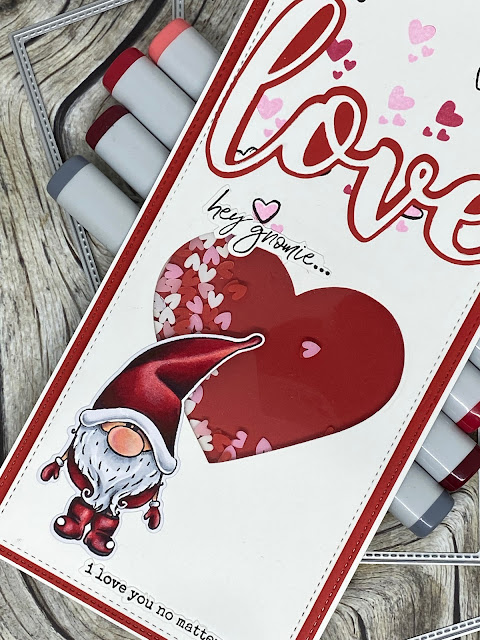
To create my card I stamped out one of the gnomes from the stamp set onto blending card and coloured with Copic markers.

Once coloured I have cut him out using the co-ordinating die.


My card base is cut with the Nesting Slimline rectangles die set with one of the hearts

from the Stitched Hearts die set placed into position to create my shaker window.


I have stamped out some of the hearts from the Gnomes stamp set in pinks

and reds above my shaker window and added

the large Love layered word over the top.

I have added hearts from the heart shaker mix to my shaker window 

and used foam tape to layer up the card and space the window.


Using one of the sentiments from the Gnomes stamp set 

completes the card


Supplies Used: 

Paper Rose:

18372 Gnomies 4 x 6 Stamp set

18375 Gnomies Co-ordinating die set

16730 Stitched Hearts Stacking Die Set

20868 Nesting Slimline Rectangles

18042 Love Large Layered Word

18921 Heart Shaker Mix


Copic Markers:

R22 ,  R29 , R59 , C05

C00 , C01 , C03

E000 , E00 , E04 , E11 , R20


Thanks for stopping by to have a look,


See You next time 


Mandy xx


Friday, February 4, 2022

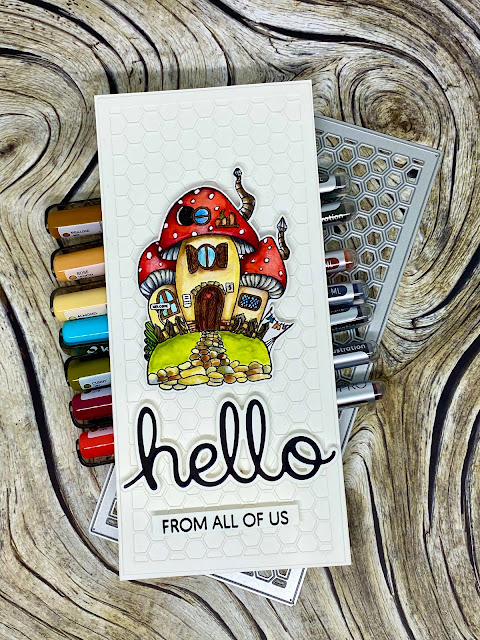
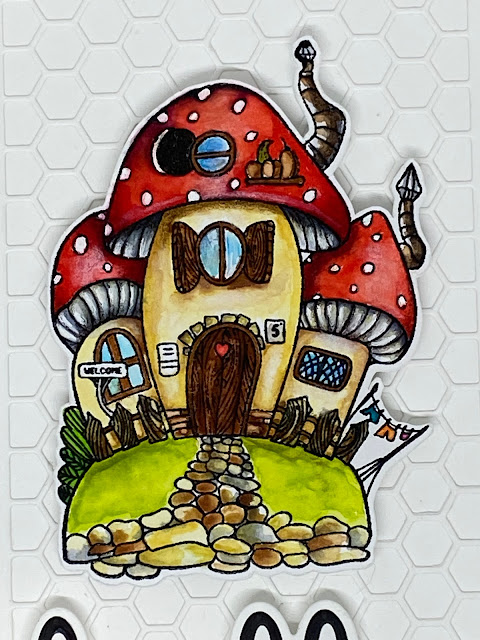
Mushroom House Card For Paper Rose Studio


Hello crafty friends


Today I am sharing my latest card  1 created

for Paper Rose Studio.


I have used Rangers Distress watercolour cardstock as my base for my stamped and watercolored 

 image as it is really resistant to "pilling" and breaking down when using brush tip 

watercolour markers.

I have coloured with Karin Watercilor Brush pens.


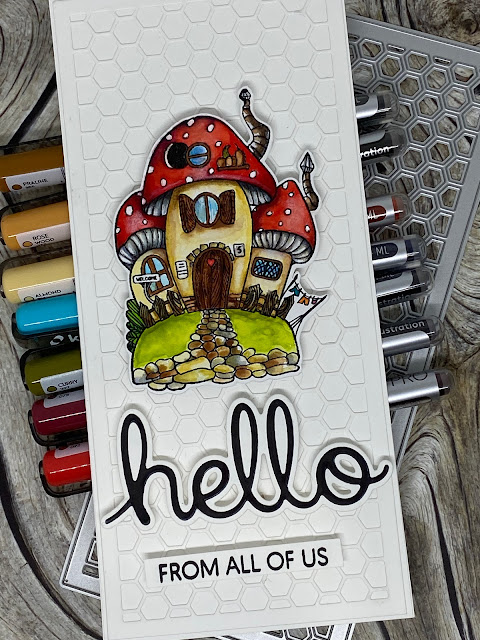
For the card base I have used the Slimline Card Creator Hexie die which I have matted on a slightly 

larger rectangle using the same card that the Hexi die is cut from.

For theses layers I used Neenah Solar White card.


I have stamped the mushroom houses in Versafine Clair Ink in Nocturn 
on the watercolour card and used my heat gun to dry it off before colouring with the Karin Markers.
When using watercolour pens I slowly build up the layers starting with a light colour wash and adding
 layers of colour to create light and dark tones.


 Once the mushroom houses have dried completely, I have used my scan and cut to 
cut out the image leaving a small border.

I have used foam tape to mount the image onto the card base

 adding some dimension to the card.


My Sentiment is stamped and die cut from the Hello stamp and matching die set.


Supplies used from Paper Rose:

24616 Mushroom House 1 Clear Stamp

21189 Slimline Card Creator 5 Hexie

17304 Hello 4 x 6 Stamp Set

16951 Layered Hello Die Set


others:

Karin Watercolour Brush Pens

Ranger Distress Watercolour Cardstock

Versafine Clair Nocturne Ink


Thanks for stopping by 


Until next time 


Mandy x

Tuesday, January 25, 2022

Georgia Floral Butterfly Card


Hello there


I'm back with my third DT card for January for 

Paper Rose Studio


I have stamped this gorgeous floral Butterfly stamp onto 
Mi-tientes Pastel paper and coloured in both the butterfly wing and flowers with 
Prismacolor Pencils.


To Frame the coloured butterfly I have cut out the Swirl Rectangle die
three times over using white cardstock.
I have glued the three layers together stacking them together so they line up 
to create a deeper more textured frame.
I have added sentiment and die cut word to complete the card.


Prismacolour Rainbow!


detail of the pencil blending 


Supplies used: 


Paper Rose Studio:

24649 Georgina Floral Butterfly

20129 Ornate swirl Rectangle  Frame

20165 So Extra White 1.0 Sentiments

19679 Wonderful Fine Script Layered word Die


Prosmacolor Pencils:

932 Violet, 1008 Parma Violet, 956 Lilac, 934 Lavender

914 Cream, 916 Canary Yellow, 1002 Yellowed Orange, 918 Orange

1032 Pumpkin Orange, 937 Tuscan Red

1026 Greyed Lavender, 993 Hot Pink, 994 Process Red, 935 Black


Art Alchemy Metalic waxes:

Rose Gold 

White Gold


Thanks for stopping by 

I will be sharing more cards next month as I am staying 

on for another  year with Paper Rose! 


Until Next Time 


Mandy x

Friday, January 14, 2022

Lilly Bouquet Birthday greetings


Hello again,


It's my turn to share another project for Paper Rose Studio and for my card today 

I have coloured the beautiful new Lilly Bouquet stamp. 


This stamp is so lovely and i have kept my card really quite simple to

show off the detailed pencil colouring.


I stamped out the image onto pastel paper using VersaFine ink, 
I like to use pastel paper for detailed pencil colouring as it holds the pigment of the pencils without getting that waxy look I get from papers that have less tooth to them.


working from the shadows and darker tones, I have layered my colours up
adding my lightest tones last


After colouring I have  fussy cut the image and Layered it onto my card base.


A quick sentiment from the Rainbow Sentiment pack and a die cut word complete the card.
As the colouring is very detailed I have kept everything else very simple.


Supplies used: 

24565 Lilly Bouquet stamp set

18255Friend layers word die

19026 Really Rainbow Sentiment pack


Polychromos Pencils:

101 White, 102 Cream , 108 Dark Cadmium , 113 Light Orange, 117 Light Cadmium Red

263 Caput Mortem Violet , 135 Red Violet , 199 Black

205 Cadmium Yellow Lemon , 170 May Green , 168 Earth Green Yellowish

167 Permanent Green Olive, 165 sniper green , 158 Sea Green, 167 Dark Indigo


Thank you for taking time out to have a look at my newest project. 


See you next time 


Mandy x


Tuesday, January 4, 2022

Cleo Floral Butterfly Card for Paper Rose Studio


Hello 2022!


Happy New Year to you creative friends.

Today I am sharing my first card for the year 

for Paper Rose Studio. 


I love simple clean cards with detailed colouring 
and to create the card using the Cleo Floral Butterfly stamp 
from Paper Rose Studio was great fun to make.

I have stamped out the image onto Paster Paper
 and used Prismacolor Pencils to colour in the
 butterfly wing and Flowers.


I have taken a plain card base, 
cut a window into it, 
and recessed the coloured butterfly behind the window 
with foam tape to give some dimension to the card.

I have added a sentiment and die cut word to complete the card.


Paper Rose Studio Supplies used: 

24643 Cleo Floral Butterfly stamp 

19679 Wonderful Fine Script die

20162 So Extra Black 1.0 Supporting Sentiment Paper Pack


Prismacolor Pencils:

white, non-photo blue, true blue, denim blue, indigo blue

greyed lavender, hot pink, process red, tuscan red

yellowed orange, pale vermillon, pumpkin orange, black grape


Thanks for stopping by 

I hope that you and your family have a wonderful year ahead


see you next time 

Mandy x


Saturday, December 25, 2021

Merry Christmas From Down Under


Hello Crafty Friends

Happy Christmas to you all, and thanks for stopping by.

It's my day to share a project and as it's Christmas Day and super hot here,

 I thought I would share a card that says all that!


I have coloured the background panel with Copic markers
 leaving white space at the top of the card to stencil in my clouds. 
I have used Distress oxide ink and a blending brush for the clouds 


after colouring the water and sand I have used a white posca paint pen, dotting in the space where 
the sea and sand meet to look like waves, this helps to "join" the area where these two colours meet.


I have coloured Santa in with Prismacolor Pencils and used the matching die to cut him out.


Supplies Used:

20715 Summer Santa Stamp Set

20716 Summer Santa Die Set


Copic Markers:

B99  B18  B16  B05  BO2  BG53

E33  E31  E30

Prismacolor Pencils:

PC931 PC925  PC924  PC922

PC1031 PC1001  PC997  PC927

PC1067  PC1054  PC1051  PC1050


Thanks for stopping by to see my latest DT card

I hope you have a wonderful holiday season

Stay safe and I hope we all

have a fantastic 2022.


Until next time 


Mandy x