Thursday, August 4, 2022

Iced Bubble Tea HB2U card


Hi There 


Today is my turn to share a card for Paper Rose Studio.


I have used the Iced Bubble Tea stamp to create a card that is a bit fun 

and modern for a teen.
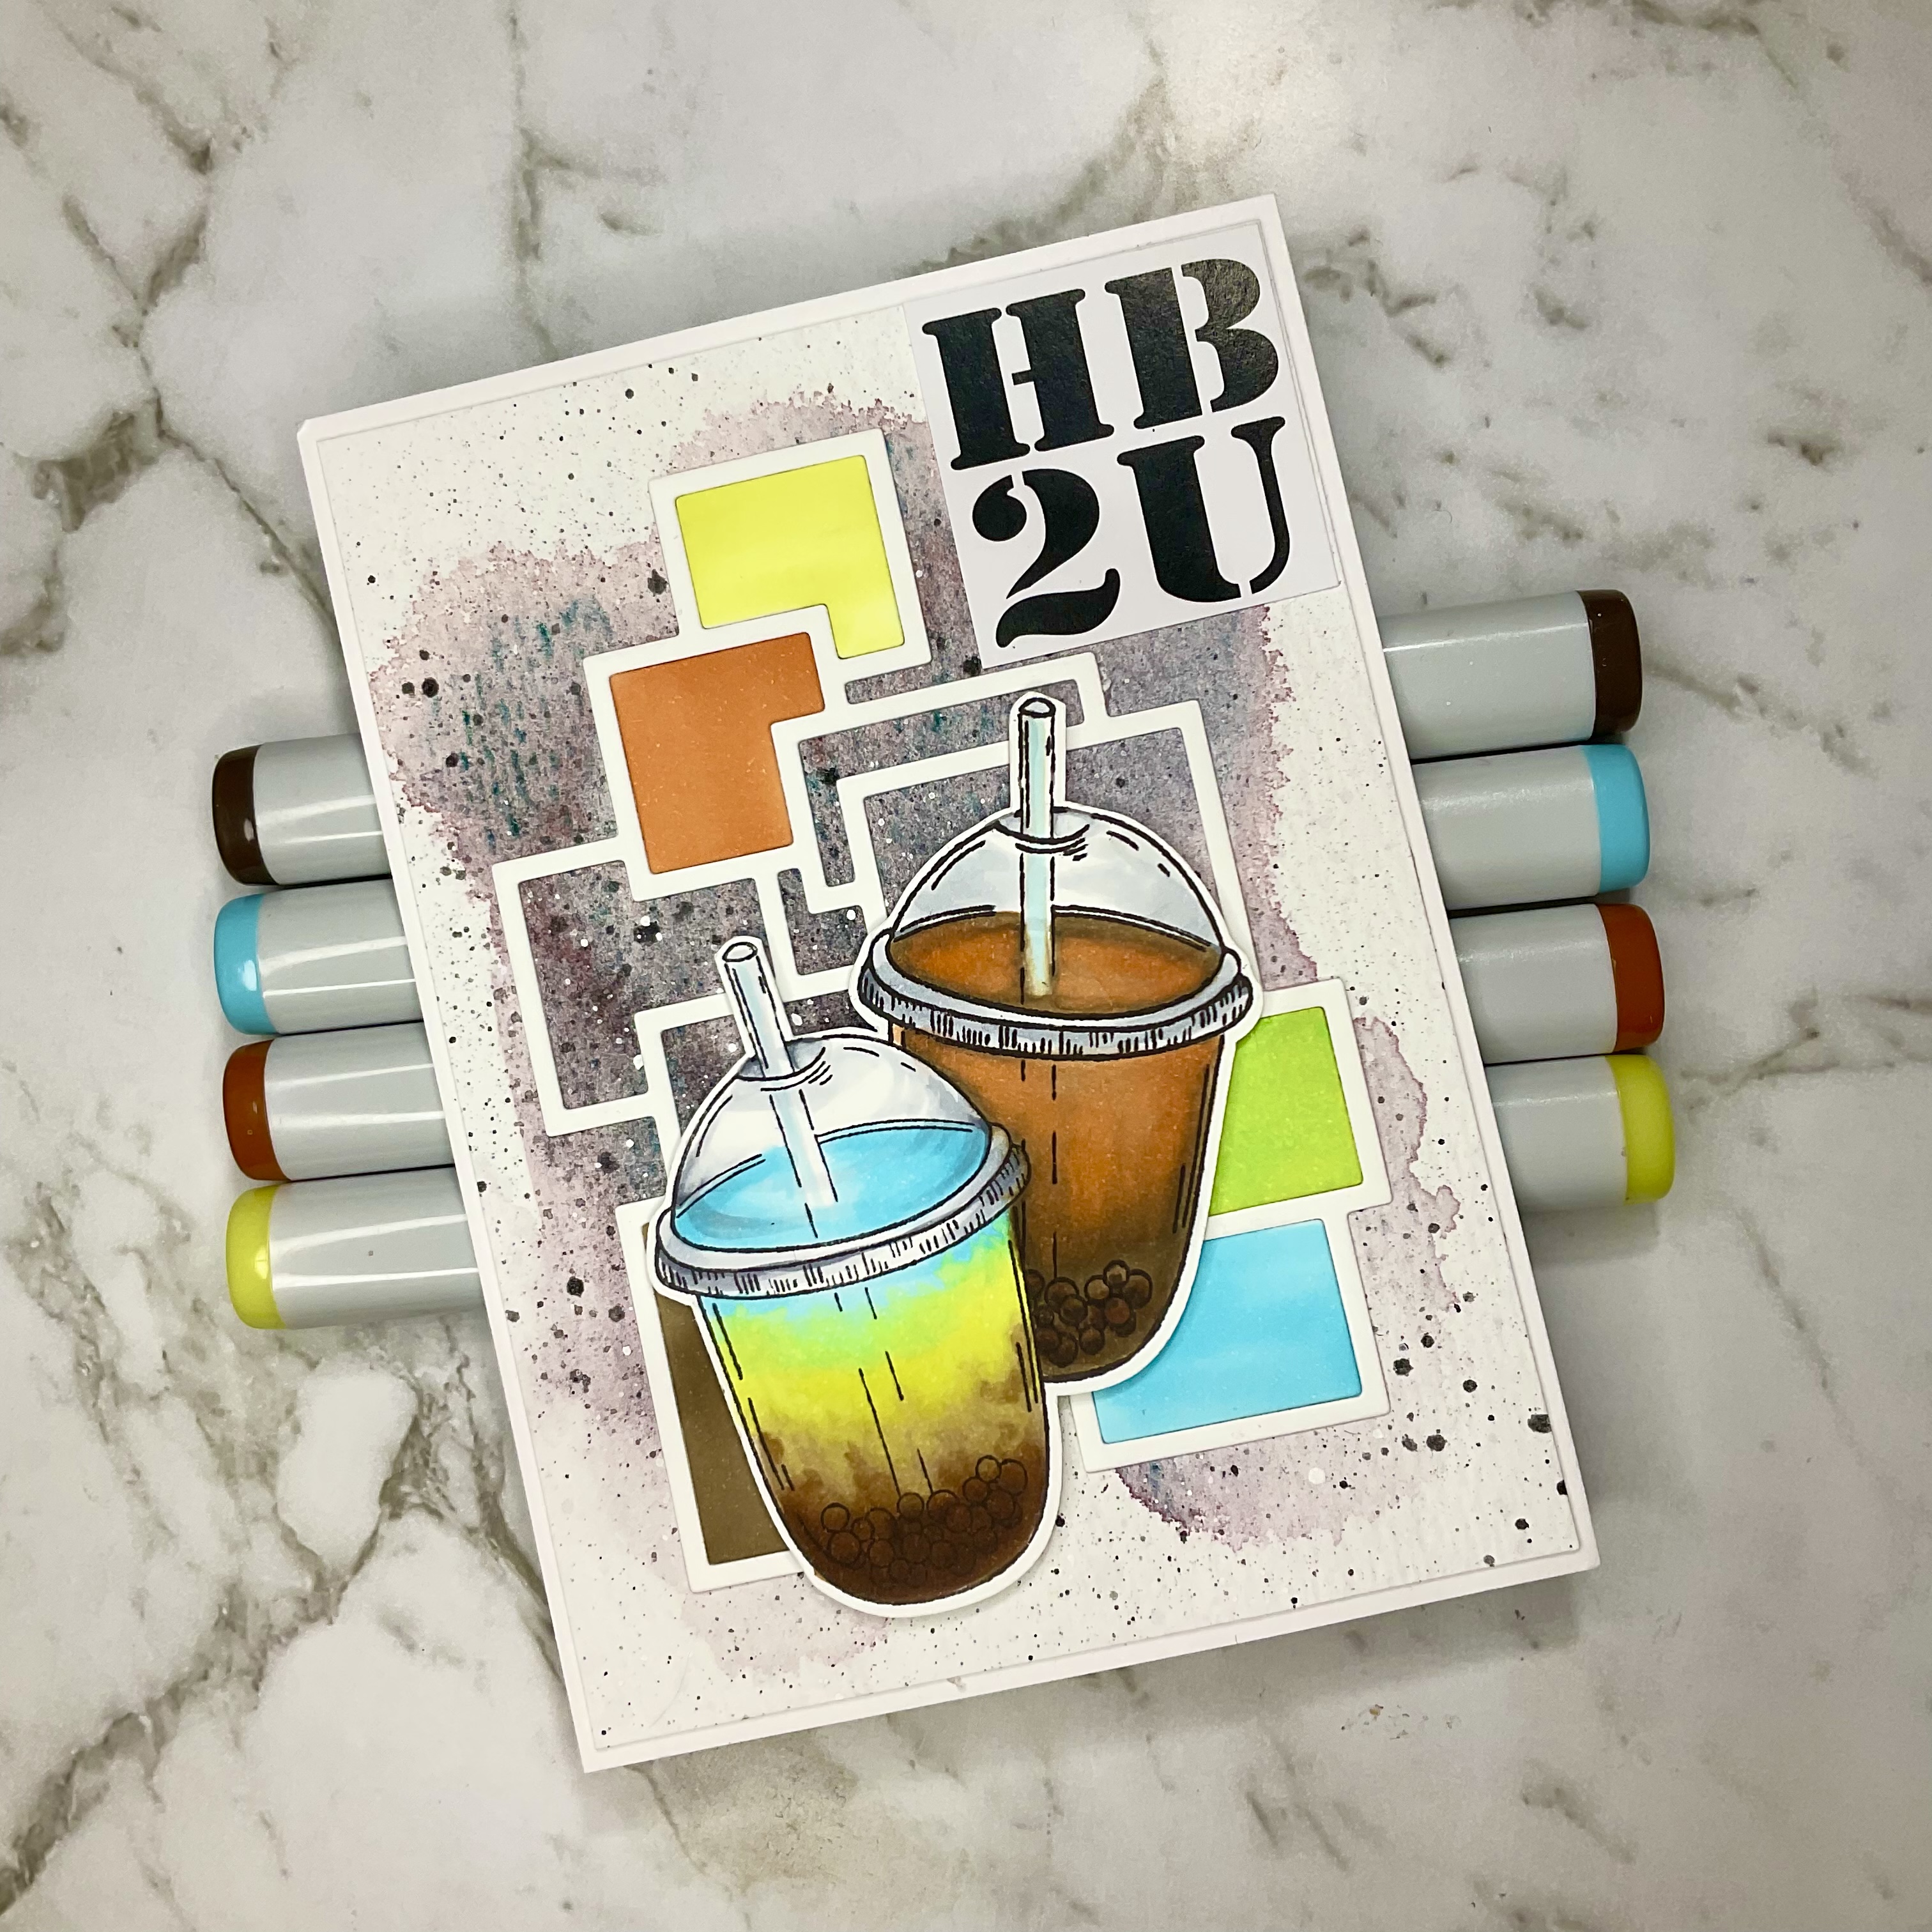


My card base is watercolour paper with a wash of colour and some splatters and my stamped image 
is coloured with copic markers.


I have stamped out the bubble tea image twice 
masking the first stamping to prevent overlapping lines.


I wanted to colour two different looking bubble teas so I Googled a few images of different types of teas and came up with some fun colours. 

below is the image I used as inspiration for my tea colour combination.


Brown Sugar Butterfly Pea Milk Bubble Tea Recipe | Gimme Bubble Tea


To complete my card I have added the stacked square die onto my water colour card based. I have pieced in some of the cut out panels that I have coloured with copic markers.


I have added a sentiment from the Big Black and White sentiment pack to complete my card


Supplies Used: 

24727 - Iced Bubble Tea Stamp
18661 Stacked Squares Die
19289 Big Black and White Sentiments


Watercolour paints


Copic Markers:
Tea 1
BG01  B00  YG21  Y00  E41  E42
Tea 2
E44 E42  E41  YR02  E97
Cup lids
C05  C03  C01
Pearls
E79  E29  E59


Thanks for stopping by to have a look at my latest card

Until Next time 

Mandy xx


Saturday, July 23, 2022

Perfect sized coffee


 hello there

I hope you are all enjoying your weekend.

. . I have another card to share with you for Paper Rose Studio.

Have used the Perfect Sized Coffee stamp for my card


.


My card same time is Simple and all about the cute stumped mage.
I have used Holbein colored pencils to color the image in. The card base has been die cut and
Colored win distress oxide ink and a blending brush.
Once blended I have layered everything together and used a sentiment 
From the black and white sentiment pack.


Once coloured I have used the Polaroid frame die to cut it out

This makes it the perfect size to fit inside the frame.

To create depth and dimension l have cut out the frame four times and glued them

Stacked together to raise both the frame and the center at the

same time.


Supplies used

26140 Perfect Sized Coffee stamp set

17232 Polaroid Frame Die

18430Cable Knit Coverplate Die

19023 Black and white sentiments  

Distress Oxide Ink

Speckled Egg

Holbein Coloured Pencils


Thanks for slopping by

Until next time

Mandy x


Thursday, July 14, 2022

Olivia's Blooms Thank You Card


Hello

Today I am sharing my second card for July  

for Paper Rose Studio

This card is a bit different from my usual style because it has a patterned paper 

base layer that really gives it a fresh look that contrasts well with the bright coloured daisies. 


The base of the card are simple die cut papers using the nesting slimline ovals dies in the largest size 
and the Nesting Slimline Stitched Rectangles also in the larger size.


The daisies are from the Olivias Blooms stamp set and I have stamped out this cute little daisy 
out several times onto blending card 
using Memento tuxedo black ink 
and coloured with copic markers in bright pinks and oranges.


Once coloured in I have used my scan n cut to die cut the flowers and leaves 
and scattered them onto my background 
 some of the daisies and leaves are stuck down using foam tape 
raising them up off the card base.


To complete my card I have used the Thank You Block word die which I have cut out three times and stacked the letters together to lift the letters  up off the card base. 
Its a bit fiddly glueing all the letters together but it does make the sentiment stand out and it 
looks neater then using foam tape.


Supplies used:
Paper Rose Studio 

25846 Olivia's Bloom Stamp
21165 Thank You Block Word Die
20868  Nesting Slimline Stitched Rectangles 
25615 Nesting Slimline Ovals
19208 Paint Pour Papaer Pack A5

Copic Colours:

RV69  RV09  RV17  RV06  RV04  RV02

YR09  YR04  Y19  Y15 

YG67  YG63  YG03


I hope you find some crafting time in your day

until next time 

Mandy x


Monday, July 4, 2022

Lydia's Blooms Card


Hello again

Today I am sharing my first project for July, I can't believe that we have 

made it to halfway through the year.


.

My card is quite simple, but the patterned paper used for the card base really
 helped to "pop" the red flowers 


I have stamped the flowers on blending card using Memento Tuxedo Black ink and coloured
them with Copic Markers.


Once coloured I have used my Brother Scan N Cut to cut them out. 
I have die cut the the Hello layered Oval word die 
in charcoal coloured card and the oval base from the set in white card.


I have layered my sentiment oval on foam tape to add depth to my card 

as well as some of the flowers.


Supplies used: 

25852 Lydia's Bloom Stamp Set

26071 Hello Layered Oval Die

Paper Rose Studio decorative paper


Copic Markers:

R22  R29  R59  C05

Y13  Y17  Y19  YR24

G21  G94  G99

Thursday, June 23, 2022

Trevor and Friends Birthday card


Hello again


I am back to share my third project for June.

My card today has a gel medium resist background using a stencil 

to create the pattern.


Creating the background is quite simple, I have taped my stencil down on to my base card, that is cut larger than my card size which will be trimmed to  the size I want later on.
I have then applied clear Gel medium to the stencil using a palette knife. 
Once I have applied an even layer across the stencil I have removed the tape and stencil. 
I have then let the gel medium dry completely.


I have inked the stencilled gel medium with Distress Oxide ink using a blending brush.
There is a lovely texture to the card base and i thing that the damask pattern looks 
like vintage wallpaper.


My stamped image has been coloured with copic markers and cut out using my 
Brother Scan N Cut machine.


I have completed the card with a couple if die cut sentiments.


Supplies Used:

Paper Rose Studio

26119 Trevor and Friends Clear stamp

18876 Damask 6 x6 stencil

19589 Happy Birthday Chunky Word die

20913 Best Wishes Fine Script Layered Word die


Memento Ink Tuxedo black

Distress Oxide Speckled Egg

Golden Matt Gel Medium

Copic Markers:

Trevor Y11  Y15  Y19

Bunnies 

1) E30  E31  E33

2) C0  C01  C03  C05

3) E70  E71  E74

ears / noses E02  R02

Teacup BG10  BG23  BG32  BG49

R29 R39

shadows W0  W01  W03

Chair E17  E18  E29


Thanks for stopping by, 

Until next time 


Mandy x


Tuesday, June 14, 2022

Folk Flowers Thank You Card.


Hello there

I'm back to share my second card for June
For Paper Rose Studio.

I have made a very Simple card using the
Folk Flowers stencil.


-

The background of my card is made using the stencil and distress oxide inks.
 I have used a blending brush to apply the inks through the stencil using pinks and greens.


Because I am layering my colors starting from light to dark,
I have used my Make Art Station and magnets to hold the stencil in place 
allowing me to add different tones of each color where needed


Ihave added vellum under the floral oval die to mute down the background allowing the sentiment to stand out a little more. The thanks snd oval die cut are cot out multiple times and stacked together giving dimension to the card.

Supplies used:

19718  Folk flowers 6x6 stencil
20234 Spring Oval Die set
19667 thanks fine script word die

Distress Oxide Inks
Scattered Straw
Saltwater Taffy
Ripe Persimmon
Shabby Shutters
Forrest Moss


Thank for stopping by
See you next time
Mandy x


Saturday, June 4, 2022

Flower Pot Border Birthday Card


Hello there

I have a card to share today for 

Paper Rose Studio.


For this card I have used both sets of the Flower Pot Border stamp sets.

I have also used copic markers to colour.


My card base is very simple with a white die cut on a white card base.
 This adds some interest but allows the coloured pots to really stand out.


I have added a sentiment and layered word die to complete my card.


Supplies used:

Paper Rose Studio

24634 Flower Pot Border stamp Set 1

24637 Flower Pot Border stamp Set 2

18581 Striped Coverplate Border Die 

20904 Happy Birthday Fine Script Die

19023 Black and white Sentiment Sheets

Copic Markers:

Aged Brass combo: 

Y26  Y28  YG93  R02  R05

Old Pottery;

E31  E33  E35  E37

teal:

BG11  BG15  BG49


Thanks for stopping by 

Have a wonderful weekend 


Mandy x