Showing posts with label Copic Markers. Show all posts

Wednesday, September 14, 2022

Juliet’s Blooms on a Watercolour Background


Hello  there. 

My latest card that I am sharing with you today has a background 

That was made using watercolour pencils.


The card base is Ranger Distress watercolour card, I
 like this a lot when using watercolour
 pencils because It is really heavy duty and 
doesn’t flake or buckle when I add a lot of pigment with the pencils and the water
Needed to move the pigment around.


Once I scribbled my chosen colors out onto the card  I used a wet brush to blend out 
The pigment mixing the colors together.
Once dry I added some liquid sparkle in areas following the patterns created 
When blending out the pigment.


I stamped out the flowers and leaves in Memento Tuxedo black ink
 onto blending card and coloured them with Copic Markers, I then used my Scan N Cut
 to cut them out which saved having to fussy cut them out.


I cut out the words from The Tall Happy Birthday die set four times and 
Glued them all together stacking them to add some dimension, once this was done
 I used some antiquing wax on them to add a hombre effect
 making the words darker at the bottom. 
I then added a little liquid sparkle to add some glitz.
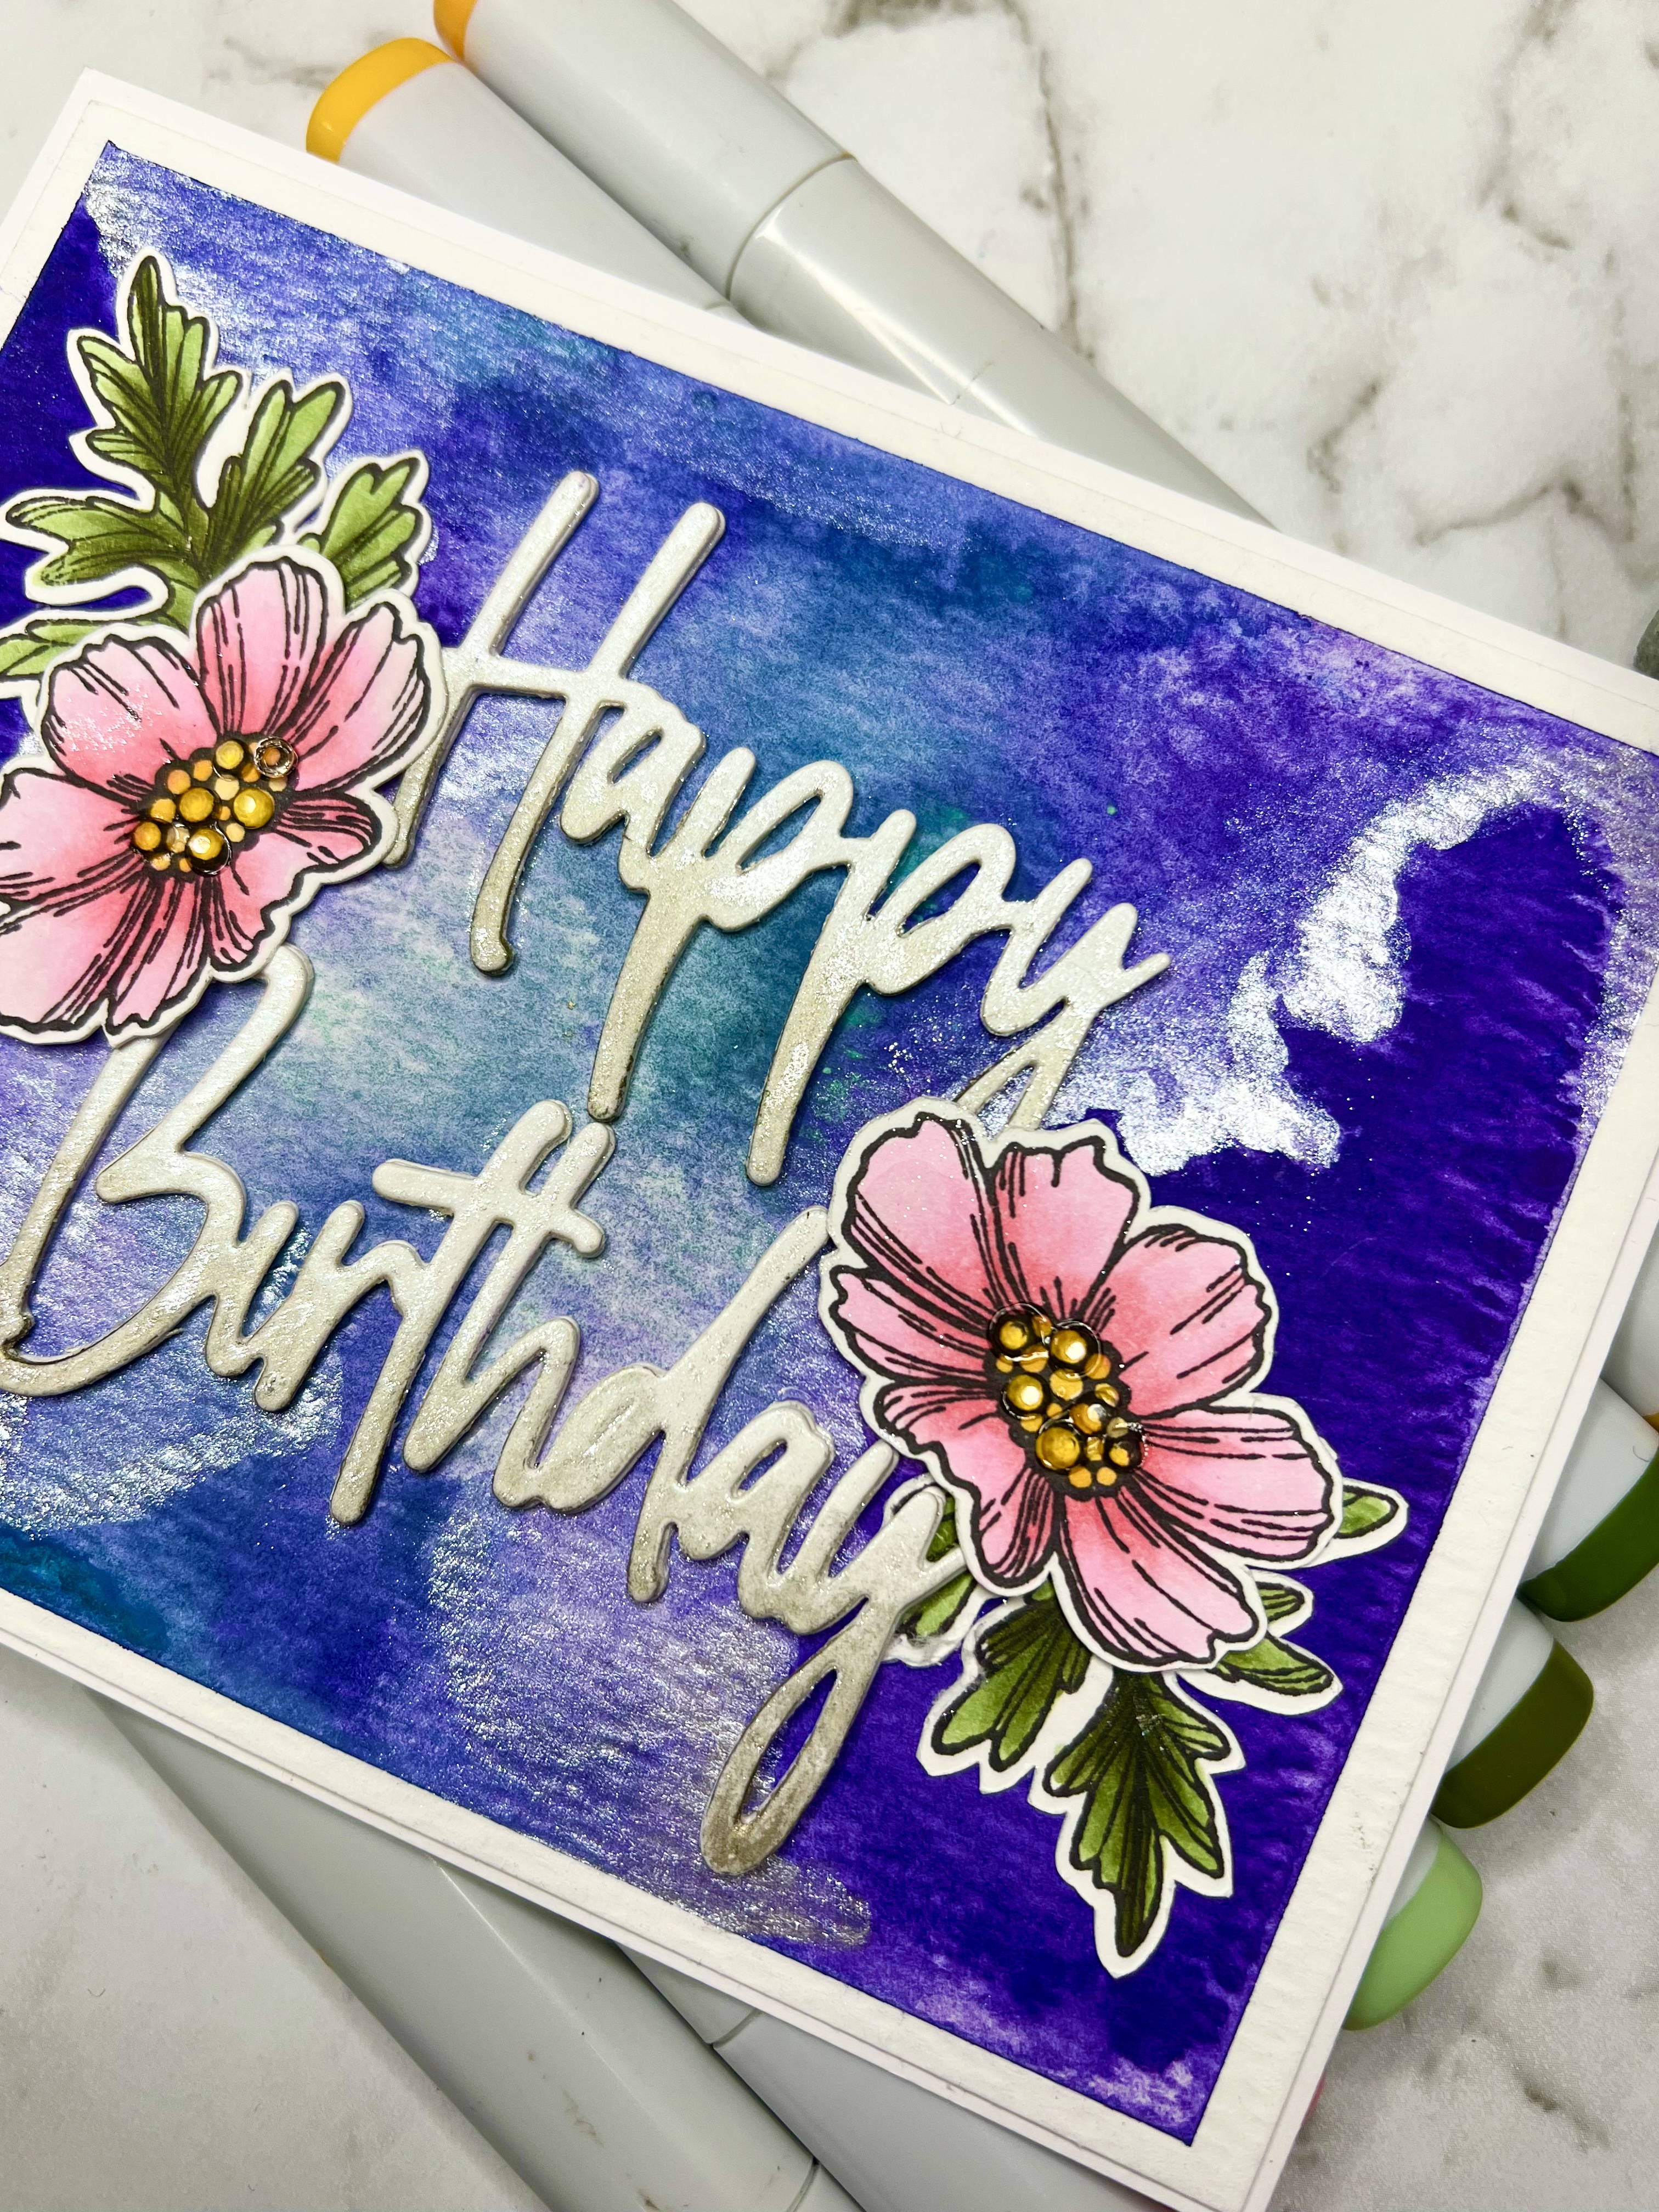


I also added a few clear gems to the centers of the flowers.


Supplies Used: 
25840 Juliet’s Blooms Stamp Set
26101 Tall Script Happy Birthday Word dies

Ranger Distress Watercolour Card
Watercolour Pencils
Paper RoseLiquid Sparkle
Small Clear gems


CopicMarkers:
V000 RV02 RV13
Y17 Y38
G21 G94 G99


Thanks for stopping by to see my latest card for Paper Rose Studio


Until Next Time 

Mandy x


Tuesday, August 23, 2022

Frankie the fox Card


Today my card that I have made for Paper Rose Studio

Uses the sweet Frankie The Fox stamp along with the Sally’s Bloom

Stamp set


I have used a soft vintage blue as my card base and layered my sentiment circle die cut
over the top
I have stamped out the flowers and leaves from the Sally’s Bloom Set 
multiple times and used  Markers to colour them in.


Once Coloured in I have cut out all the leaves and flowers with my 
Scan N Cut machine.


The. Stamped out Frankie the fox is also copic coloured and cut out.
I have arranged the flowers and laeves randomly around the sentiment frame.
Using foam tape I have raised up some of the flowers and leaves to add dimension.


I have also added a sentiment from the all Occasions Sentiment pack to complete 
My card.


Supplies Used:

26131 Frankie The Fox Clear Stamp

25888 Sally’s Bloom Clear Stamp

18366 Sentiment Circle Die

22339 All Occasions Sentiment Pack


Copic Markers

E09 E08 YR27 E35

RV13 RV02 V000

Y38 Y17 YR31

G99 G94 G21

W00 W01


Thanks for stopping by to have a look at my latest project.

Until Next Time 


Mandy xx


Sunday, August 14, 2022

Helen’s blooms for Paper Rose Studio


Hello again


It's my day to share another project for 

Paper Rose Studio

and my card today is flowers.

I am a big fan of copic colouring flower stamps and today I have used 

the Paper Rose Helens Bloom's stamp set.


I have used the nesting slimline rectangle die for my card base, so this is quite a large card!
The oval frame is made by taping two of the nesting slimline oval dies, by spacing them evenly apart 
you get a large oval frame to use. 
I have also used the centre piece that cutting the frame makes, and this has been embossed using 
the Baby Blue embossing folder.


When stamping out the flowers I have stamped three together masking the flowers
 to prevent an overlap.
The flowers once coloured are cut out using my Scan N Cut.


Supplies Used:

23837 Helen's Blooms Stamp Set

20868 Nesting Slimline Rectangles

25615 Nesting Slimline Ovals

20384 Baby Blue Embossing Floder

16874 Happy Birthday Large Word die

17631 Happy Birthday To You Die 


Copic Markers:


RV66  RV09  RV06  RV04  RV12

V09  V17  V04  V12

R32  R35  R37  R39

R08  YR09  YR14  YR21  Y38


Thanks for stopping by

Until Next Time 


Mandy x


Thursday, August 4, 2022

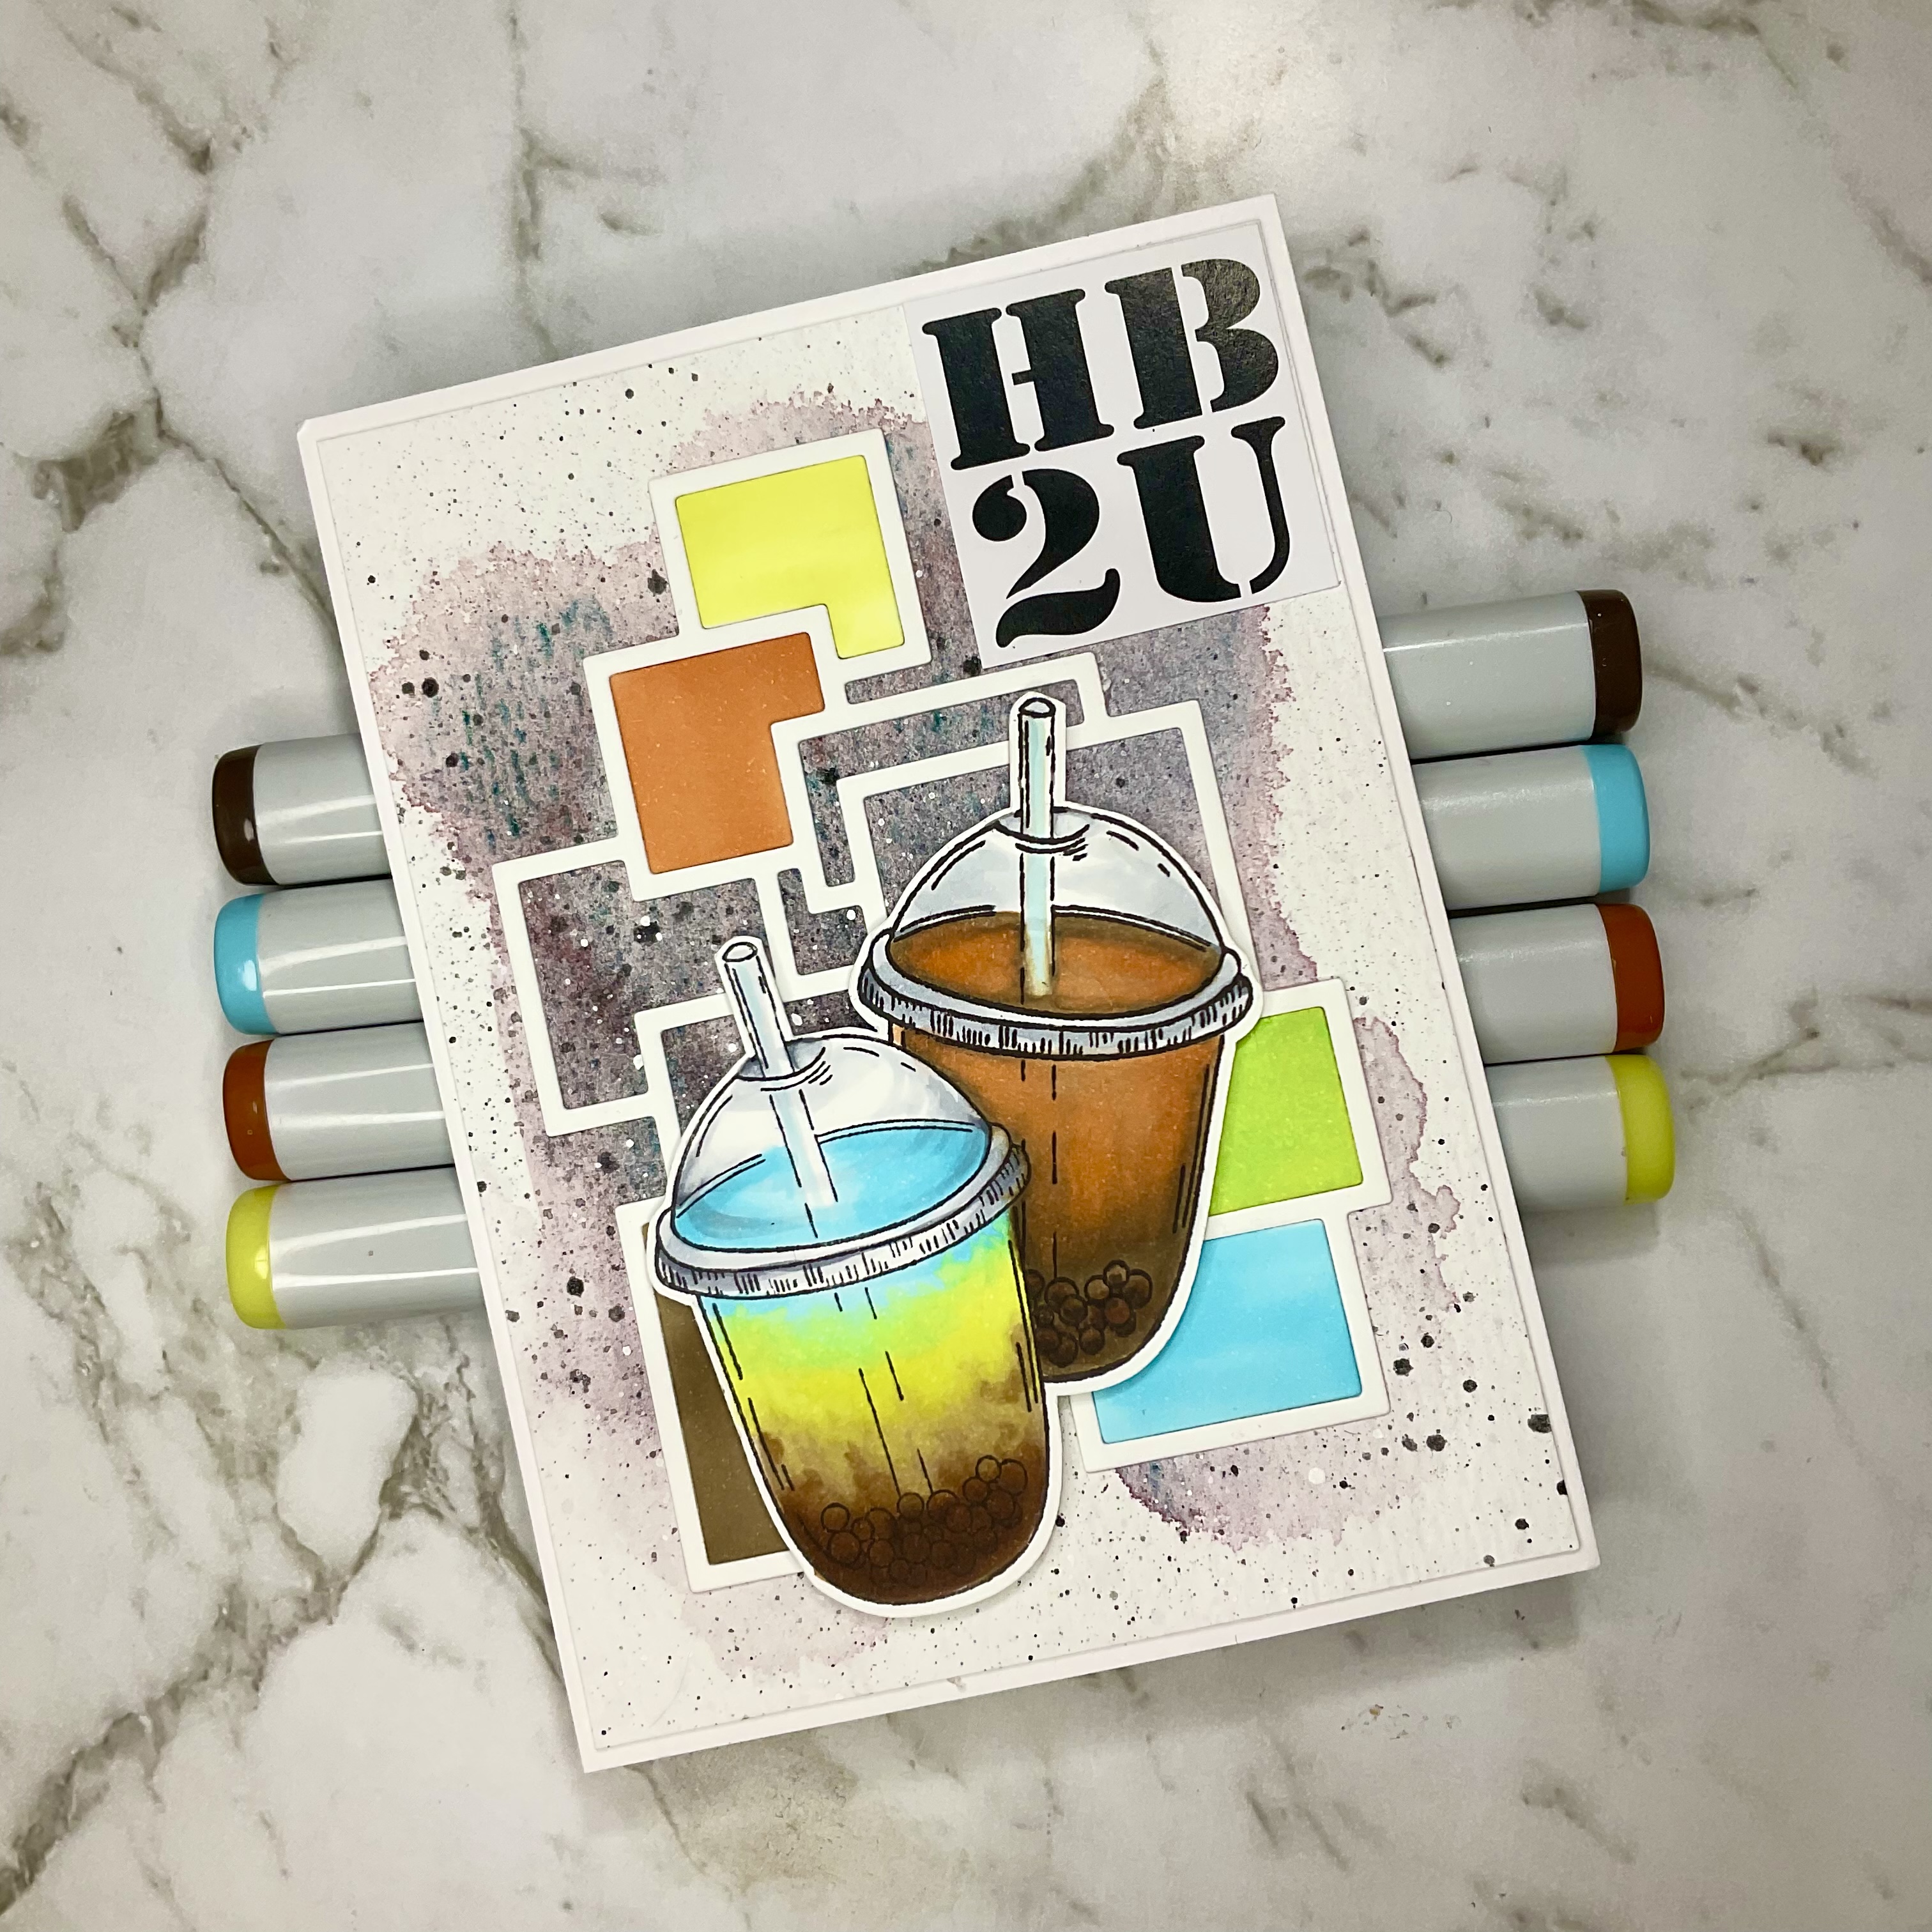
Iced Bubble Tea HB2U card


Hi There 


Today is my turn to share a card for Paper Rose Studio.


I have used the Iced Bubble Tea stamp to create a card that is a bit fun 

and modern for a teen.


My card base is watercolour paper with a wash of colour and some splatters and my stamped image 
is coloured with copic markers.


I have stamped out the bubble tea image twice 
masking the first stamping to prevent overlapping lines.


I wanted to colour two different looking bubble teas so I Googled a few images of different types of teas and came up with some fun colours. 

below is the image I used as inspiration for my tea colour combination.


Brown Sugar Butterfly Pea Milk Bubble Tea Recipe | Gimme Bubble Tea


To complete my card I have added the stacked square die onto my water colour card based. I have pieced in some of the cut out panels that I have coloured with copic markers.


I have added a sentiment from the Big Black and White sentiment pack to complete my card


Supplies Used: 

24727 - Iced Bubble Tea Stamp
18661 Stacked Squares Die
19289 Big Black and White Sentiments


Watercolour paints


Copic Markers:
Tea 1
BG01  B00  YG21  Y00  E41  E42
Tea 2
E44 E42  E41  YR02  E97
Cup lids
C05  C03  C01
Pearls
E79  E29  E59


Thanks for stopping by to have a look at my latest card

Until Next time 

Mandy xx


Thursday, July 14, 2022

Olivia's Blooms Thank You Card


Hello

Today I am sharing my second card for July  

for Paper Rose Studio

This card is a bit different from my usual style because it has a patterned paper 

base layer that really gives it a fresh look that contrasts well with the bright coloured daisies. 


The base of the card are simple die cut papers using the nesting slimline ovals dies in the largest size 
and the Nesting Slimline Stitched Rectangles also in the larger size.


The daisies are from the Olivias Blooms stamp set and I have stamped out this cute little daisy 
out several times onto blending card 
using Memento tuxedo black ink 
and coloured with copic markers in bright pinks and oranges.


Once coloured in I have used my scan n cut to die cut the flowers and leaves 
and scattered them onto my background 
 some of the daisies and leaves are stuck down using foam tape 
raising them up off the card base.


To complete my card I have used the Thank You Block word die which I have cut out three times and stacked the letters together to lift the letters  up off the card base. 
Its a bit fiddly glueing all the letters together but it does make the sentiment stand out and it 
looks neater then using foam tape.


Supplies used:
Paper Rose Studio 

25846 Olivia's Bloom Stamp
21165 Thank You Block Word Die
20868  Nesting Slimline Stitched Rectangles 
25615 Nesting Slimline Ovals
19208 Paint Pour Papaer Pack A5

Copic Colours:

RV69  RV09  RV17  RV06  RV04  RV02

YR09  YR04  Y19  Y15 

YG67  YG63  YG03


I hope you find some crafting time in your day

until next time 

Mandy x


Monday, July 4, 2022

Lydia's Blooms Card


Hello again

Today I am sharing my first project for July, I can't believe that we have 

made it to halfway through the year.


.

My card is quite simple, but the patterned paper used for the card base really
 helped to "pop" the red flowers 


I have stamped the flowers on blending card using Memento Tuxedo Black ink and coloured
them with Copic Markers.


Once coloured I have used my Brother Scan N Cut to cut them out. 
I have die cut the the Hello layered Oval word die 
in charcoal coloured card and the oval base from the set in white card.


I have layered my sentiment oval on foam tape to add depth to my card 

as well as some of the flowers.


Supplies used: 

25852 Lydia's Bloom Stamp Set

26071 Hello Layered Oval Die

Paper Rose Studio decorative paper


Copic Markers:

R22  R29  R59  C05

Y13  Y17  Y19  YR24

G21  G94  G99

Thursday, June 23, 2022

Trevor and Friends Birthday card


Hello again


I am back to share my third project for June.

My card today has a gel medium resist background using a stencil 

to create the pattern.


Creating the background is quite simple, I have taped my stencil down on to my base card, that is cut larger than my card size which will be trimmed to  the size I want later on.
I have then applied clear Gel medium to the stencil using a palette knife. 
Once I have applied an even layer across the stencil I have removed the tape and stencil. 
I have then let the gel medium dry completely.


I have inked the stencilled gel medium with Distress Oxide ink using a blending brush.
There is a lovely texture to the card base and i thing that the damask pattern looks 
like vintage wallpaper.


My stamped image has been coloured with copic markers and cut out using my 
Brother Scan N Cut machine.


I have completed the card with a couple if die cut sentiments.


Supplies Used:

Paper Rose Studio

26119 Trevor and Friends Clear stamp

18876 Damask 6 x6 stencil

19589 Happy Birthday Chunky Word die

20913 Best Wishes Fine Script Layered Word die


Memento Ink Tuxedo black

Distress Oxide Speckled Egg

Golden Matt Gel Medium

Copic Markers:

Trevor Y11  Y15  Y19

Bunnies 

1) E30  E31  E33

2) C0  C01  C03  C05

3) E70  E71  E74

ears / noses E02  R02

Teacup BG10  BG23  BG32  BG49

R29 R39

shadows W0  W01  W03

Chair E17  E18  E29


Thanks for stopping by, 

Until next time 


Mandy x


Wednesday, May 4, 2022

Spring Blooms For Mothers Day


Hello there 

Can you believe that we are now in May and almost half way through this year?


My card today is for Paper Rose Studio,

and as we are celebrating Mothers Day this weekend,

I have chosen to share a floral card I made for my mum to give 

to her on Sunday.


I have used bright happy colours for  the lovely flowers in this stamped image,
I love how all the colours are quite random and yet together give a spring garden feel.


I have used Copic markers to colour the stamped image and Distress Oxide ink in Salvaged Patina
for the blended background.
I have cut out the coloured image using my Scan N Cut allowing me to blend a background card without having to be careful not to ink over my copic colouring.


The Mothers word stamped and sentiment finish off the card nicely.


Supplies Used:
25282 Spring Bloom Clear Stamp 
17982 Ella's garden Mothers layered word die
20165 So Extra White Sentiment Paper Pack


Distress Oxide ink : Salvaged Patina


Copic Markers:
Reds: R32  R35  R37  R39
Pinks: RV11 RV32  RV34  E04
Purples: V000  V01  V04  V06  V09
Yellows: Y06  Y15  Y38  YR27
Green Set 1: YG03  YG63  YG67  G99
Green Set 2: G40  G82  G94  G99


Thank you for popping in to see my latest card!

Have a fabulous day, and if you are celebrating Mothers Day this Sunday

I hope that you have a wonderful day celebrating with you family


 Mandy xx


Saturday, April 23, 2022

Coloured 'Hombre Butterflies in Copic Markers


Hi again.


Today I am sharing another card for

Paper Rose Studio.

My card uses the Bethany Butterfly stamp.


To make this card I have stamped out the Bethany Butterfly stamp directly onto my card 
base in both the top right and bottom left corners of my blending card. 
I have used a copic marker friendly black ink.


I have stamped a third butterfly an a second piece of blending card  to cut
out later on after I have coloured it in.


Once all three butterflies have been coloured I have cut out 
my Hello layered word die in blending card and the shadow layer is cut from black cardstock.


I have also added a sentiment from the black and white sentiment sheets.


Once I have cut out my third  butterfly,
 I used my scan n cut for this,
 I have used foam tape to mount the third butterfly overlapping it
on top of the Hello word die cut.


Supplies used: 
Paper Rose:

24631 Bethany Butterfly Stamp
16951 Layered Hello Die
19023 Black and white sentiment sheets

Copic Markers; 
Butterfly 1 ( Orange)
YR14 , YR18 , E15 , E18

Butterfly 2 ( Teal )
BG70 , BG72 , BG75 , BG78

Butterfly 3 ( Pink )
R81 , R83 , R85 , R89

Have a fantastic weekend and I will see you next time 
with a new card

Bye for now

Mandy


Thursday, April 14, 2022

Hayley's Bouquet Card for Easter


Hello There 

At our house we are getting ready for the Easter weekend 

 and are all looking forward to a few days off together!


My card that I'm sharing today is a floral themed 

card for Easter for Paper Rose Studio.


I have used a series of Copic Markers in pinks and oranges for the flowers and berries.
and three sets of greens for the leaves.


colour swatch of colours used 


The first three rows are the greens I used for the leaves, I have arranged my colour swatch 
in horizontal rows using three or four colours to blend together to create different shades in 
my leaves.
The bottom three rows are the colours for the flowers and berries.


The background has been coloured using distress oxide inks, 

in the new colour Saltwater Taffy

 applied with a blending brush.


I have added a stamped and heat embossed sentiment to complete the card.


supplies used:

25240 Hayley's Bouquet clear stamp

25285 Happy Easter clear stamp

Distress Oxide Saltwater Taffy

blending brush

Memento Ink Tuxedo Black

clear embossing powder

Copic Markers


Thanks for stopping by 

I hope you have a wonderful time over the Holidays 

with family and friends.

Until Next Time


Mandy x

Friday, March 25, 2022

May Gibbs Mrs Kookaburra sleeping stamp from Paper Rose Studio


Hi there


How beautiful is this stamp from Paper Rose Studio

I have used the Mrs Kookaburra Sleeping stamp for this card.


I have coloured the stamped image with Copic markers,
 once coloured I used my Scan N Cut.
I have then layered this onto my background which has been painted with acrylic paint.


I added a simple layered word to complete my card.


Supplies Used:

24496 May Giggs Mrs Kookaburra Sleeping Stamp Set
16576 Stitched Rectangles A6 Die set
19703 Hugs Fine Script Layered Word die


Copic colours used:


Dina Wakely acrylic Paint in Sky

Blending Card


Thanks for stopping by to have a look 


Until next time 

Mandy x

Monday, March 14, 2022

Paper Roses Bird of Paradise stamp set


Hi there

I am back with another card for 

Paper Rose Studio


I have chosen a very simple design for my card and have used 
strong oranges and greens to colour in my stamped image.

I have stamped my image in Memento ink in London Fog ,which is a grey colour, 
onto blending card
so that once coloured in with Copic Markers the stamped lines 
are quite soft and only slightly visible.


I have used an indigo Prismacolor pencil on the leaves and flowers to
 add some depth after colouring. this helps the copic marker colours to pop.


I have used Distress Oxide ink in Tumbled glass to add some colour to the background of my card
and added a background die-cut on top.


To complete the card I have fussy cut out the Bird of Paradise and added a layered word
and sentiment.


Supplies Used:
From Paper Rose Studio:

24784 Bird Of Paradise Stamp Set
21063 Chloe's Coverplate Layer 2 Die
20904 Happy Birthday Fine Script Layered Word Die
20165 So Extra White 1.0 Sentiment pack

Copic Markers
leaves:
YG25, G24 , G28 , C7
flowers:
Y15, Y19, YR04, YR09


Thanks for stopping by 

Mandy x