Tuesday, October 4, 2022

Sarah’s Bouquet in Prismacolour Pencils


Hello There

I can’t believe that we are now into October already

Time seems to fly by these days!

I have my first project of the month for Paper Rose Studio to share.

I really enjoy colouring florals and decided to use pencils for the details in this beautiful bouquet.


I have used MiTientes pastel paper as my card base as I really like the tooth on
This paper for coloured pencil work.
I have stamped the bouquet stamp out in Versafine  black ink.


Once I had coloured all the leaves and flowers,I used two shades of light blues to blend out the background.

I then added splatters of acrylic ink in gold and black.


As the pencil blending took some time I decided to keep the rest of my 
Card  simple, leaving the floral bouquet the main focal point. 


To complete the card I have die cut the word wishes out of plain black card 
And added sentiments from the All Occasions sentiment pack.


Supplies used: 

25234 - Sarah’s Bouquet Clear Stamp
26110 Tall Script words Wishes Blessings
All Occasions Sentiment Sheets


Prismacolor Pencils
Acrylic ink Black
Windsor and Newton Metallic Gold Ink

Thank you for stopping by to see my latest card 
I will be back with another card on the 14th 

Until Next time 

Mandy x


Friday, September 23, 2022

Monkey Birthday card


Hello Again 

I am back to share with you my third project for  this month.

Today I have used coloured pencils for this fun card.


I have stamped out the leaf stamp three times at the top of the card base, this gave me a nice tree line 
When adding the swinging monkey.
The leaf stamp wasn’t very large so I didn’t need to mask anything as there wasn’t any overlap.


Once I stamped the monkey so that he appears to be swinging from the leaf branches,
I have used my prismacolour pencils to colour in both the leaves and monkey in. 

Prismacolor pencils can get waxy so I have used a lot of light layers to build up the colour.


Supplies used:

27460 Monkey and Sloth Stamp Set
24712 Bold Leaves Stamp
19289 Big Black and White Sentiments
18454 - Blending Brush with cap

Distress Oxide ink - Tumbled Glass
Carson MiTientes Pastel Paper 


Thanks for stopping by to have a look at my latest card 
I will have three new projects for you next month

Until next time 
Mandy x


Wednesday, September 14, 2022

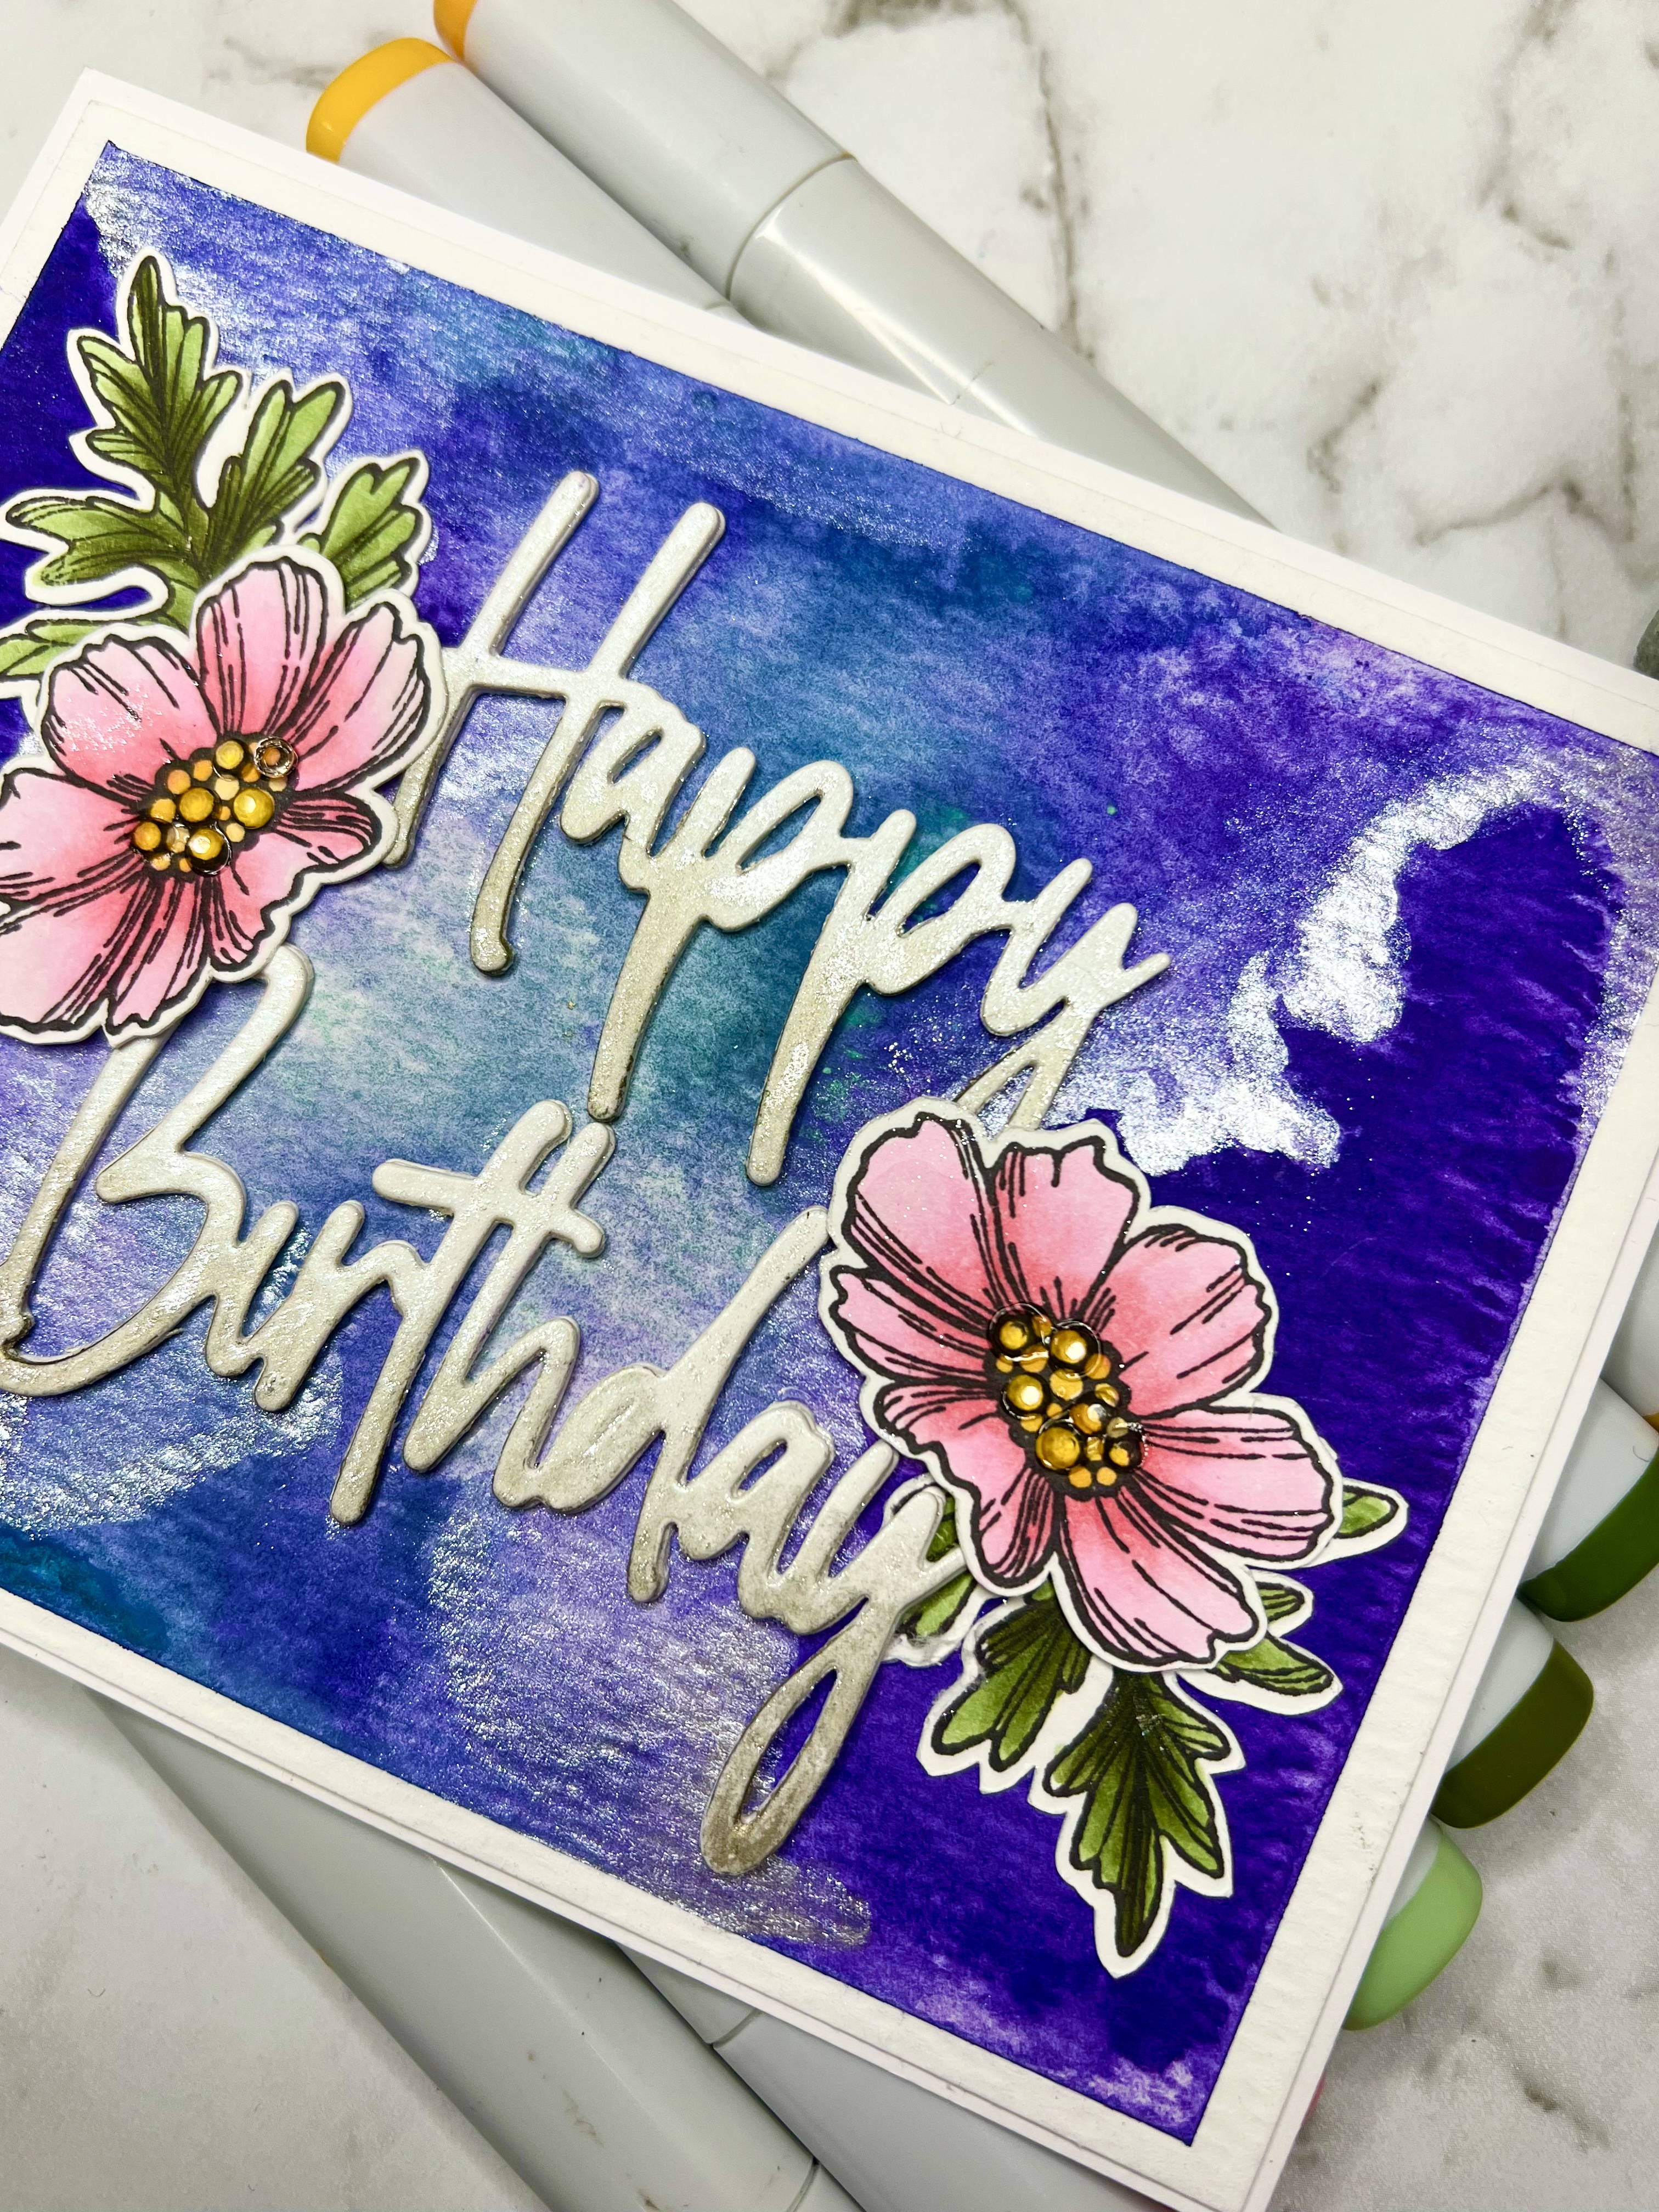
Juliet’s Blooms on a Watercolour Background


Hello  there. 

My latest card that I am sharing with you today has a background 

That was made using watercolour pencils.


The card base is Ranger Distress watercolour card, I
 like this a lot when using watercolour
 pencils because It is really heavy duty and 
doesn’t flake or buckle when I add a lot of pigment with the pencils and the water
Needed to move the pigment around.


Once I scribbled my chosen colors out onto the card  I used a wet brush to blend out 
The pigment mixing the colors together.
Once dry I added some liquid sparkle in areas following the patterns created 
When blending out the pigment.


I stamped out the flowers and leaves in Memento Tuxedo black ink
 onto blending card and coloured them with Copic Markers, I then used my Scan N Cut
 to cut them out which saved having to fussy cut them out.


I cut out the words from The Tall Happy Birthday die set four times and 
Glued them all together stacking them to add some dimension, once this was done
 I used some antiquing wax on them to add a hombre effect
 making the words darker at the bottom. 
I then added a little liquid sparkle to add some glitz.


I also added a few clear gems to the centers of the flowers.


Supplies Used: 
25840 Juliet’s Blooms Stamp Set
26101 Tall Script Happy Birthday Word dies

Ranger Distress Watercolour Card
Watercolour Pencils
Paper RoseLiquid Sparkle
Small Clear gems


CopicMarkers:
V000 RV02 RV13
Y17 Y38
G21 G94 G99


Thanks for stopping by to see my latest card for Paper Rose Studio


Until Next Time 

Mandy x


Sunday, September 4, 2022

Happy Father’s Day


Hello There

As today is Father’s Day here and also my day to share a project

For Paper Rose Studio

I thought I would share my card I made for my Dad this Father’s Day.


I have used watercolour pencils to colour wash the woodgrain card and once dry I have
Used mixed media glue to seal the colour.
I have then ink spritzed the card so that the woodgrain texture shows.


Once dry using Heavy Body paste i have stenciled the industrial stencil over the top of the 
Woodgrain base.


The Vintage motorcycle was stamped in Versamark ink and embossed using black embossing powder and cut out using the matching die set.
I have used Copic markers to colour the stamped image.
 I have coloured some of the white negative space around the bike with Copics
 in similar colors of the background as this helps inter grate everything together.


Supplies used :
17604 Vintage Motorcycle Stamp Set
17605 Vintage Motorcycle Die Set
18451 DAD Metal Word Die Set
19121 Industrial Elements Stencil
22339 All Occasions Sentiment Pack

Copic markers:
R59 R37 R27
E17 E13
C1 C3 C6

Ranger Distress Woodgrain Card
Fabre Castellated Warner Pencils
Stamperia Mixed Media Glue
Stamperia Heavy Body Paste ( white)
Black Embossing Powder


Thank you for stopping by to have a look, 
I hope you have a wonderful day with your Dads,
And my thoughts are with those who’s Dads are no longer with us

Until next time 

Mandy x


Tuesday, August 23, 2022

Frankie the fox Card


Today my card that I have made for Paper Rose Studio

Uses the sweet Frankie The Fox stamp along with the Sally’s Bloom

Stamp set


I have used a soft vintage blue as my card base and layered my sentiment circle die cut
over the top
I have stamped out the flowers and leaves from the Sally’s Bloom Set 
multiple times and used  Markers to colour them in.


Once Coloured in I have cut out all the leaves and flowers with my 
Scan N Cut machine.


The. Stamped out Frankie the fox is also copic coloured and cut out.
I have arranged the flowers and laeves randomly around the sentiment frame.
Using foam tape I have raised up some of the flowers and leaves to add dimension.


I have also added a sentiment from the all Occasions Sentiment pack to complete 
My card.


Supplies Used:

26131 Frankie The Fox Clear Stamp

25888 Sally’s Bloom Clear Stamp

18366 Sentiment Circle Die

22339 All Occasions Sentiment Pack


Copic Markers

E09 E08 YR27 E35

RV13 RV02 V000

Y38 Y17 YR31

G99 G94 G21

W00 W01


Thanks for stopping by to have a look at my latest project.

Until Next Time 


Mandy xx


Sunday, August 14, 2022

Helen’s blooms for Paper Rose Studio


Hello again


It's my day to share another project for 

Paper Rose Studio

and my card today is flowers.

I am a big fan of copic colouring flower stamps and today I have used 

the Paper Rose Helens Bloom's stamp set.


I have used the nesting slimline rectangle die for my card base, so this is quite a large card!
The oval frame is made by taping two of the nesting slimline oval dies, by spacing them evenly apart 
you get a large oval frame to use. 
I have also used the centre piece that cutting the frame makes, and this has been embossed using 
the Baby Blue embossing folder.


When stamping out the flowers I have stamped three together masking the flowers
 to prevent an overlap.
The flowers once coloured are cut out using my Scan N Cut.


Supplies Used:

23837 Helen's Blooms Stamp Set

20868 Nesting Slimline Rectangles

25615 Nesting Slimline Ovals

20384 Baby Blue Embossing Floder

16874 Happy Birthday Large Word die

17631 Happy Birthday To You Die 


Copic Markers:


RV66  RV09  RV06  RV04  RV12

V09  V17  V04  V12

R32  R35  R37  R39

R08  YR09  YR14  YR21  Y38


Thanks for stopping by

Until Next Time 


Mandy x


Thursday, August 4, 2022

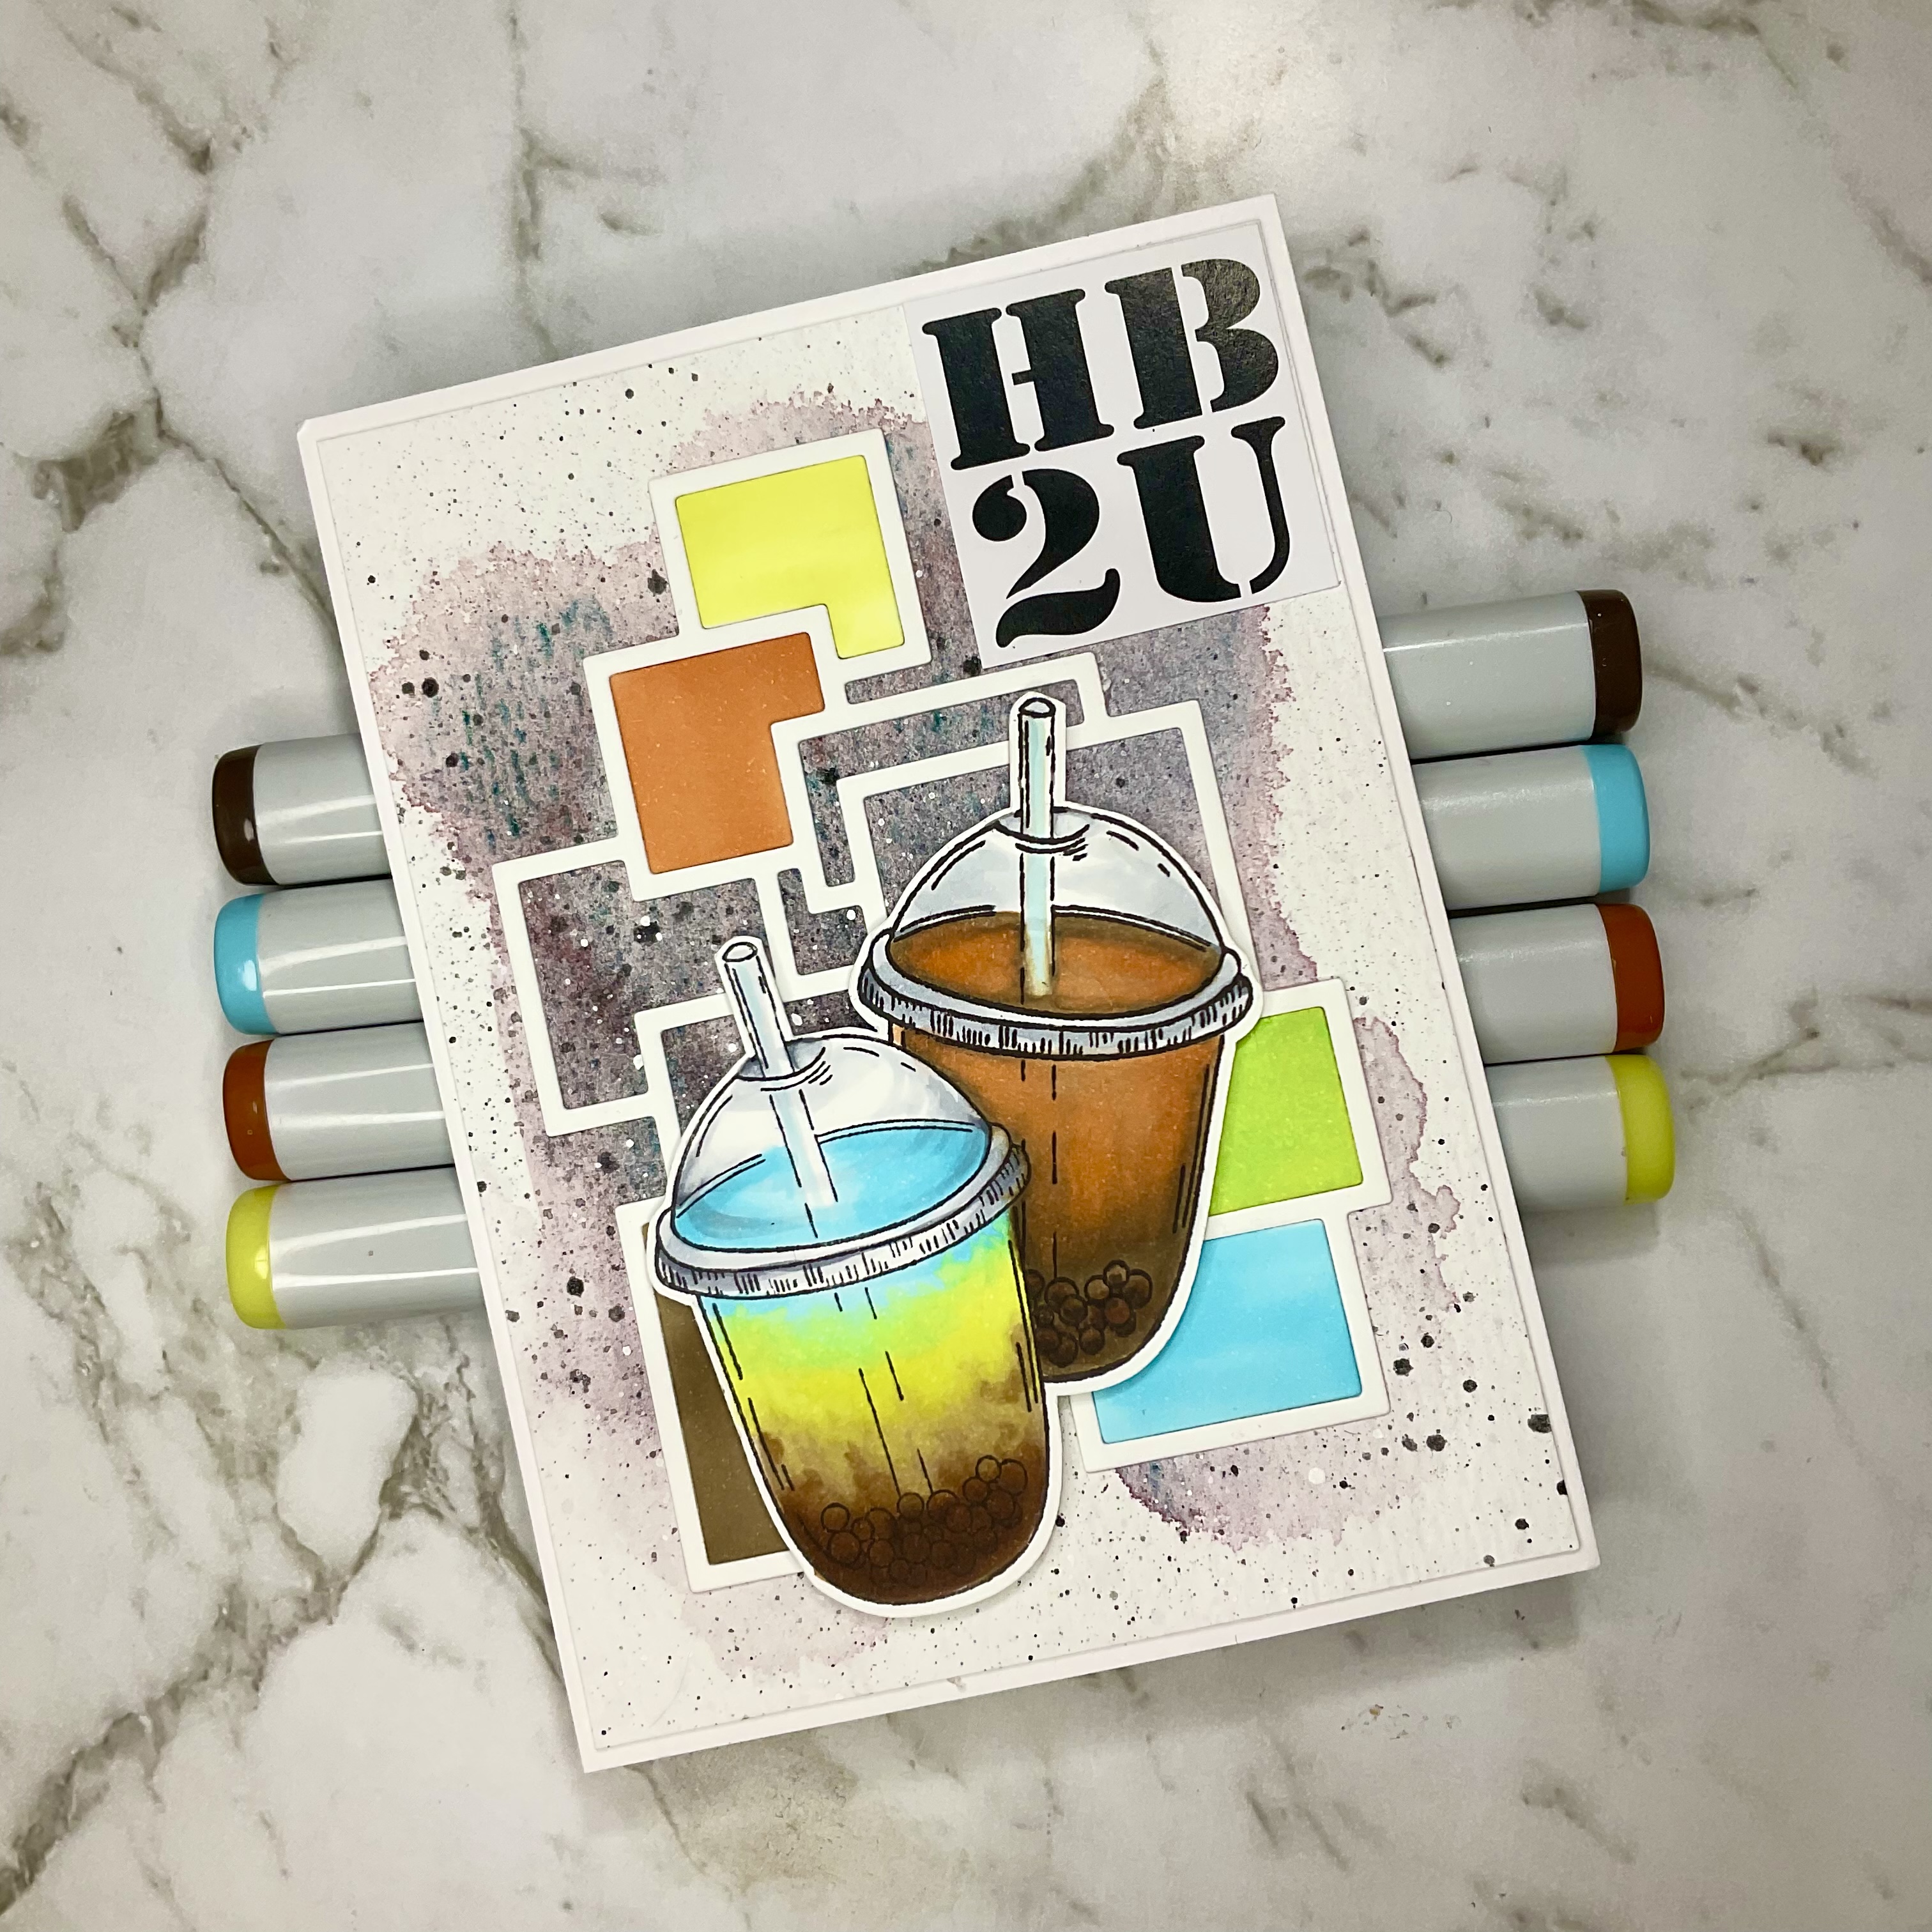
Iced Bubble Tea HB2U card


Hi There 


Today is my turn to share a card for Paper Rose Studio.


I have used the Iced Bubble Tea stamp to create a card that is a bit fun 

and modern for a teen.


My card base is watercolour paper with a wash of colour and some splatters and my stamped image 
is coloured with copic markers.


I have stamped out the bubble tea image twice 
masking the first stamping to prevent overlapping lines.


I wanted to colour two different looking bubble teas so I Googled a few images of different types of teas and came up with some fun colours. 

below is the image I used as inspiration for my tea colour combination.


Brown Sugar Butterfly Pea Milk Bubble Tea Recipe | Gimme Bubble Tea


To complete my card I have added the stacked square die onto my water colour card based. I have pieced in some of the cut out panels that I have coloured with copic markers.


I have added a sentiment from the Big Black and White sentiment pack to complete my card


Supplies Used: 

24727 - Iced Bubble Tea Stamp
18661 Stacked Squares Die
19289 Big Black and White Sentiments


Watercolour paints


Copic Markers:
Tea 1
BG01  B00  YG21  Y00  E41  E42
Tea 2
E44 E42  E41  YR02  E97
Cup lids
C05  C03  C01
Pearls
E79  E29  E59


Thanks for stopping by to have a look at my latest card

Until Next time 

Mandy xx